Navigation:
How it started
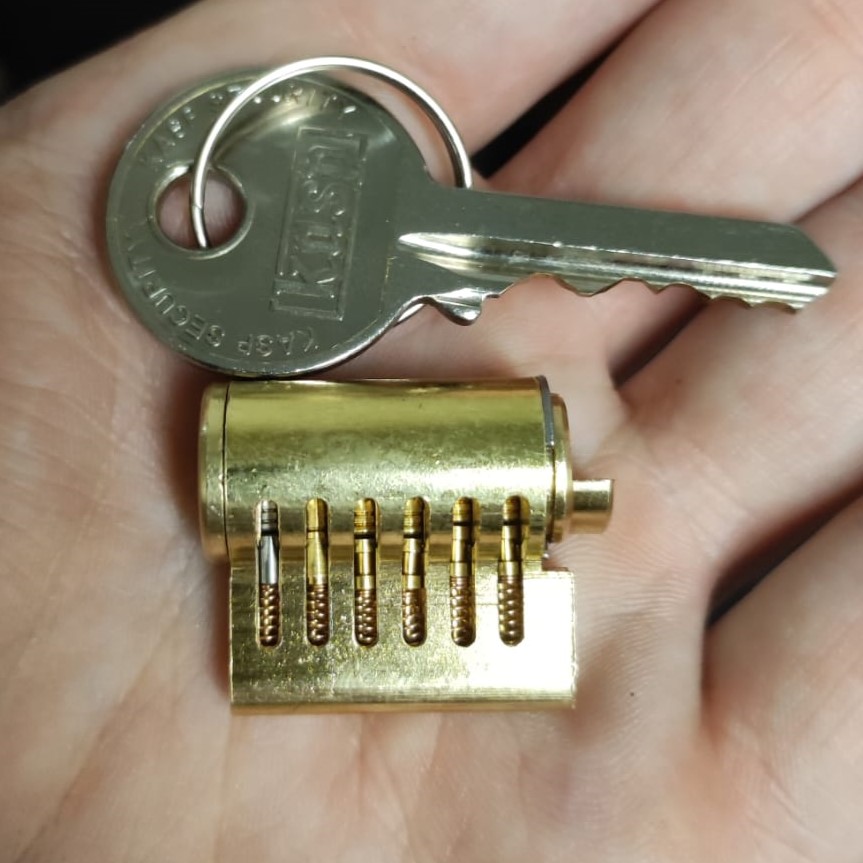
After I started lockpicking, it didn’t take long to get fascinated with the different lock mechanisms. One of the challenges was trying to understand how each mechanism worked, and once I understood, how to show it to others. This is where I got into cutaway making. My first cutaway was from a simple 4-pin cylinder and was made with an angle grinder. It wasn’t pretty, but it worked!
3D printing cutaways
Prior to getting into locksport, I already owned multiple 3D printers. Since resin printing is such a precise technique, I came up with the idea to make resin-printed cutaways. This way, I was able to create cleaner cutaways without diving into more advanced methods of machining metal. The lock worked great, but since it was plastic, it felt noticeably different while picking.
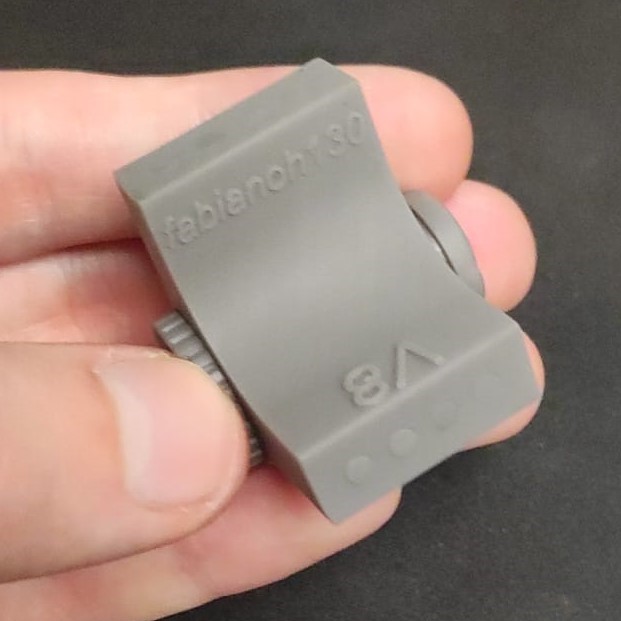
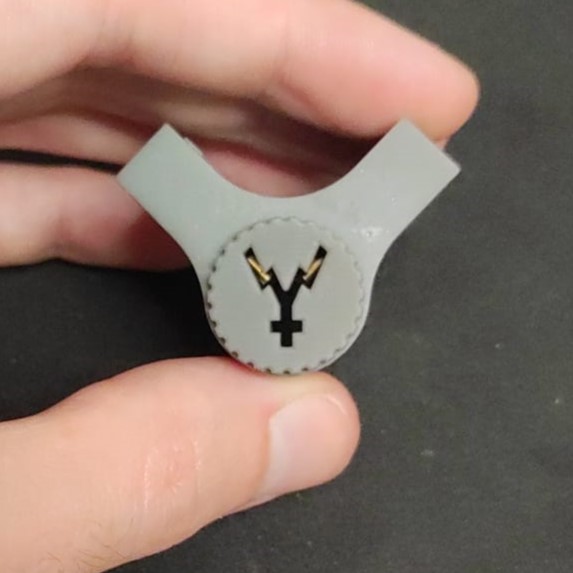
This did, however, get me into 3D printing locksport-related items. Among other things, I designed a “V8” challenge lock.
Creating the first CNC mill
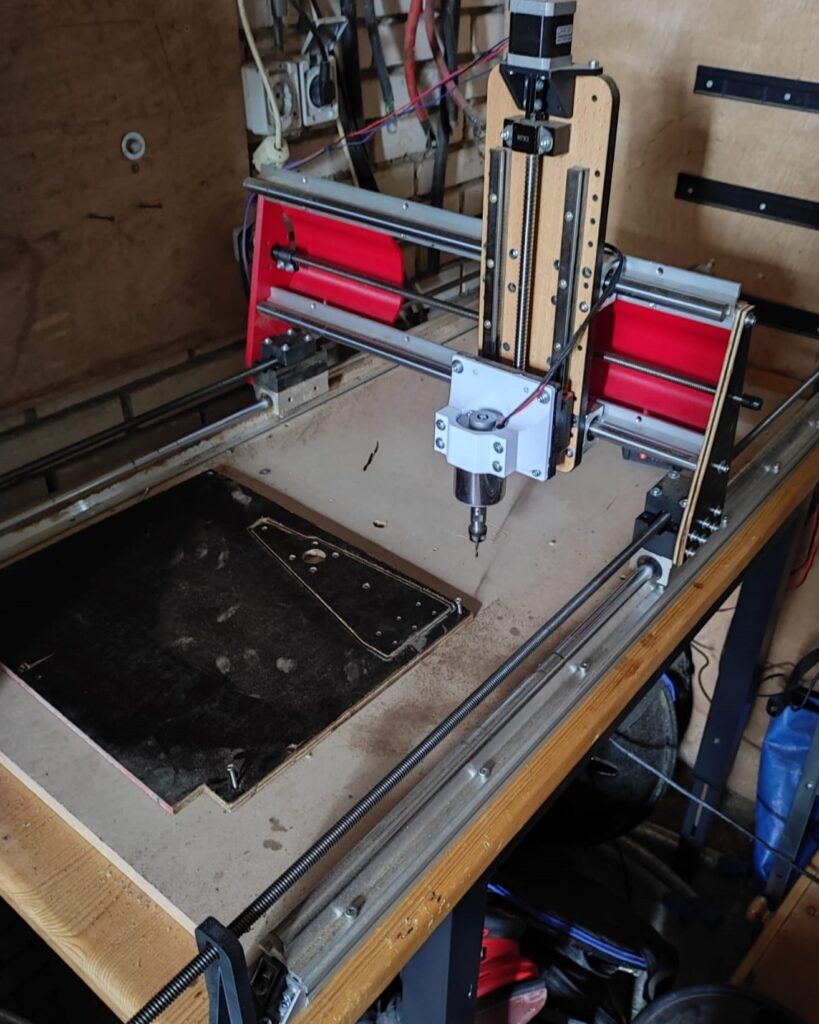
To step up my cutaway making quality there was no way arround getting a mill. Since i already had experience with making 3d printers i decided to make something myself. Since i had no experience in machining manually it had to be a CNC mill. So i started desiging the parts, printing them, assembling the machine. the plastic parts were obisouly not stiff enough so i let the newly created machine cut its own parts from wood and afterwards from aluminium. Also swapped out the small router for something a bit more sturdy.
The first cuts
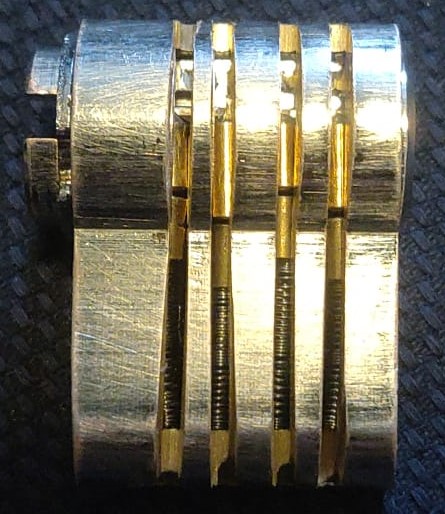
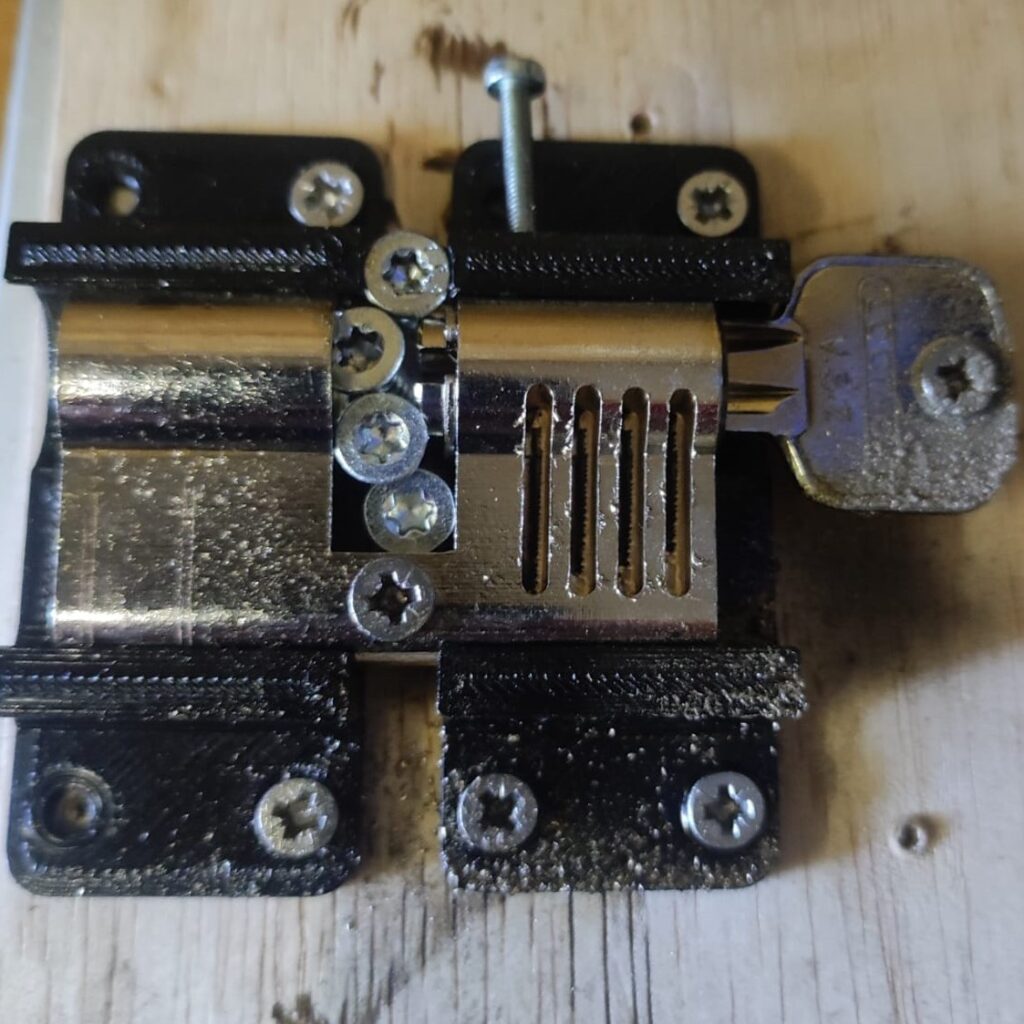
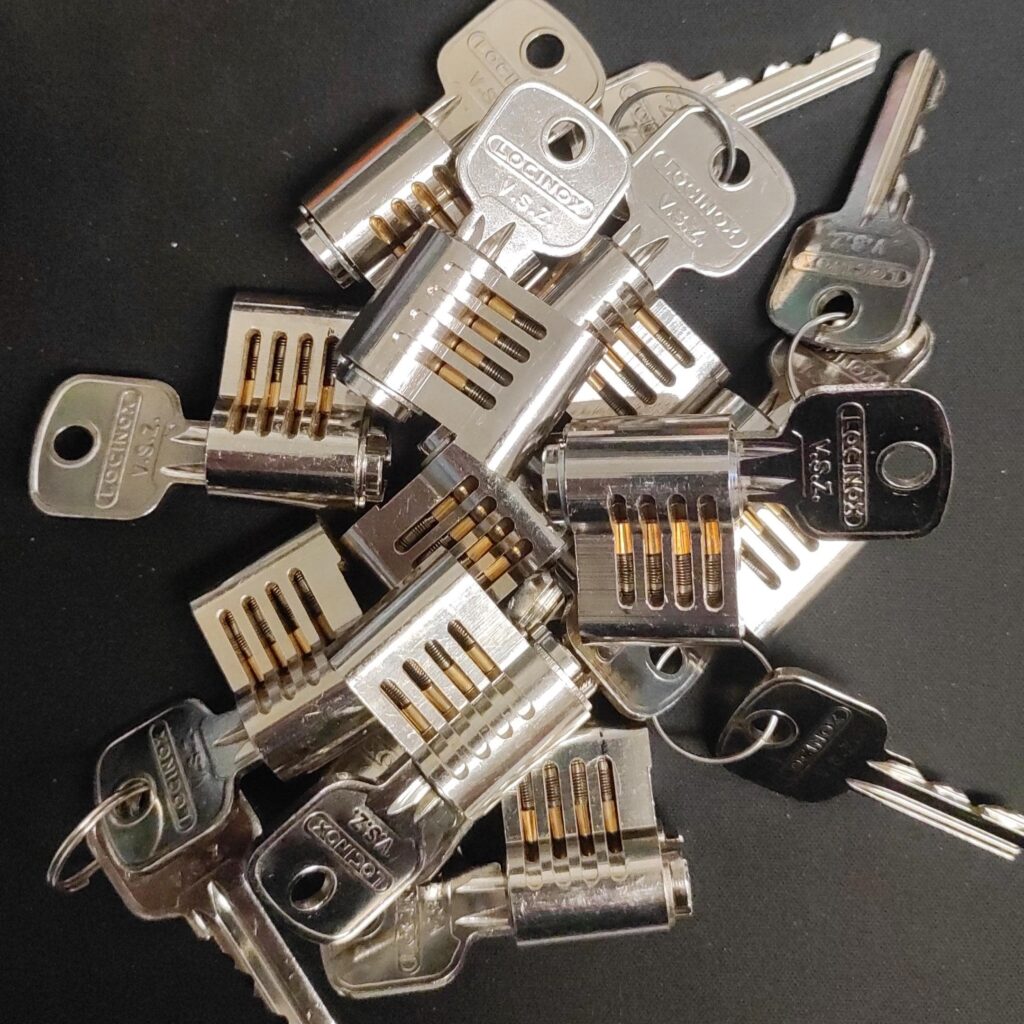
I was able to get my hands on a box of 4-pin Locinox cylinders. Nothing special, but ideal to start with since they were so cheap that it wouldn’t matter if I messed one up. The next challenge was figuring out how to clamp the lock down. The Euro cylinder format isn’t flat, so I 3D printed a holder that I could screw the lock onto.
They needed a little bit of cleanup, but the cuts looked way better than my previous attempt with the angle grinder. I decided to make a whole bunch to add to the starter packs I was selling at the time.
Getting the hang of it
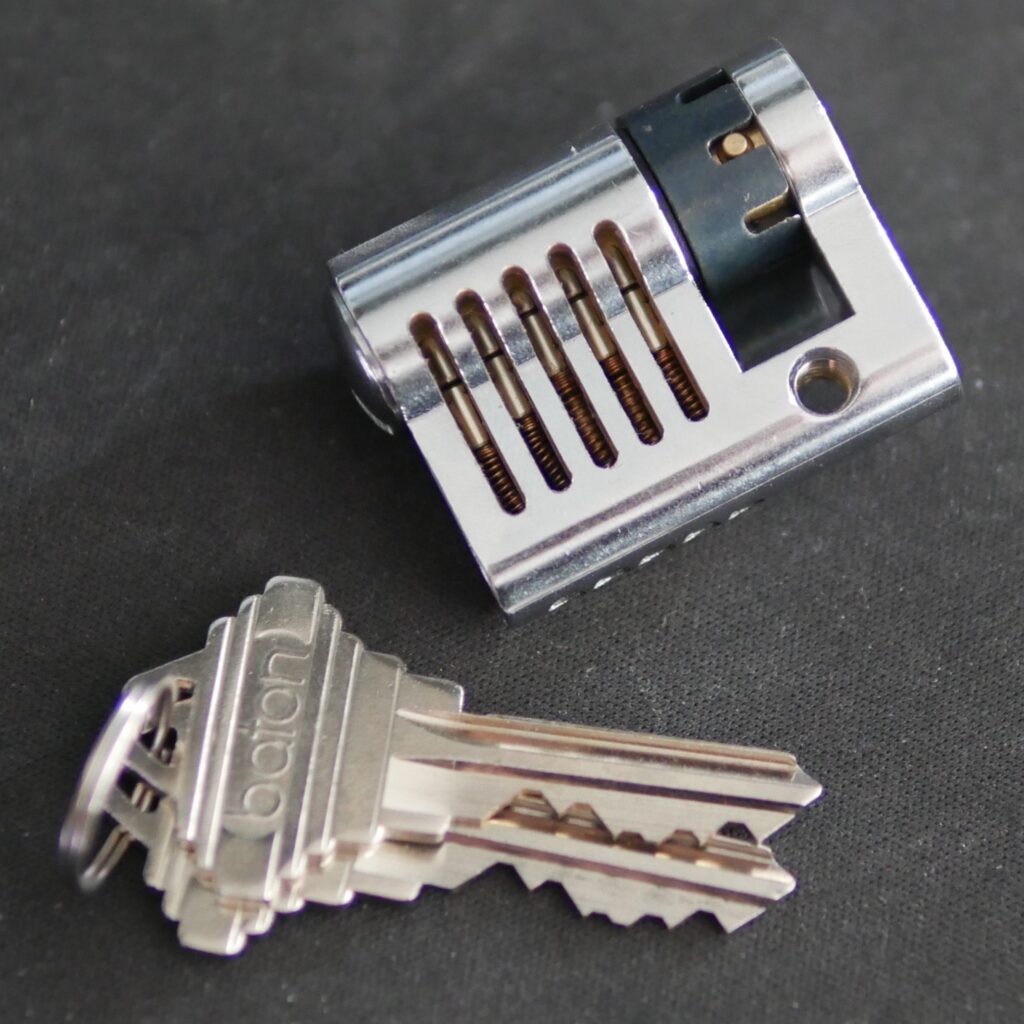
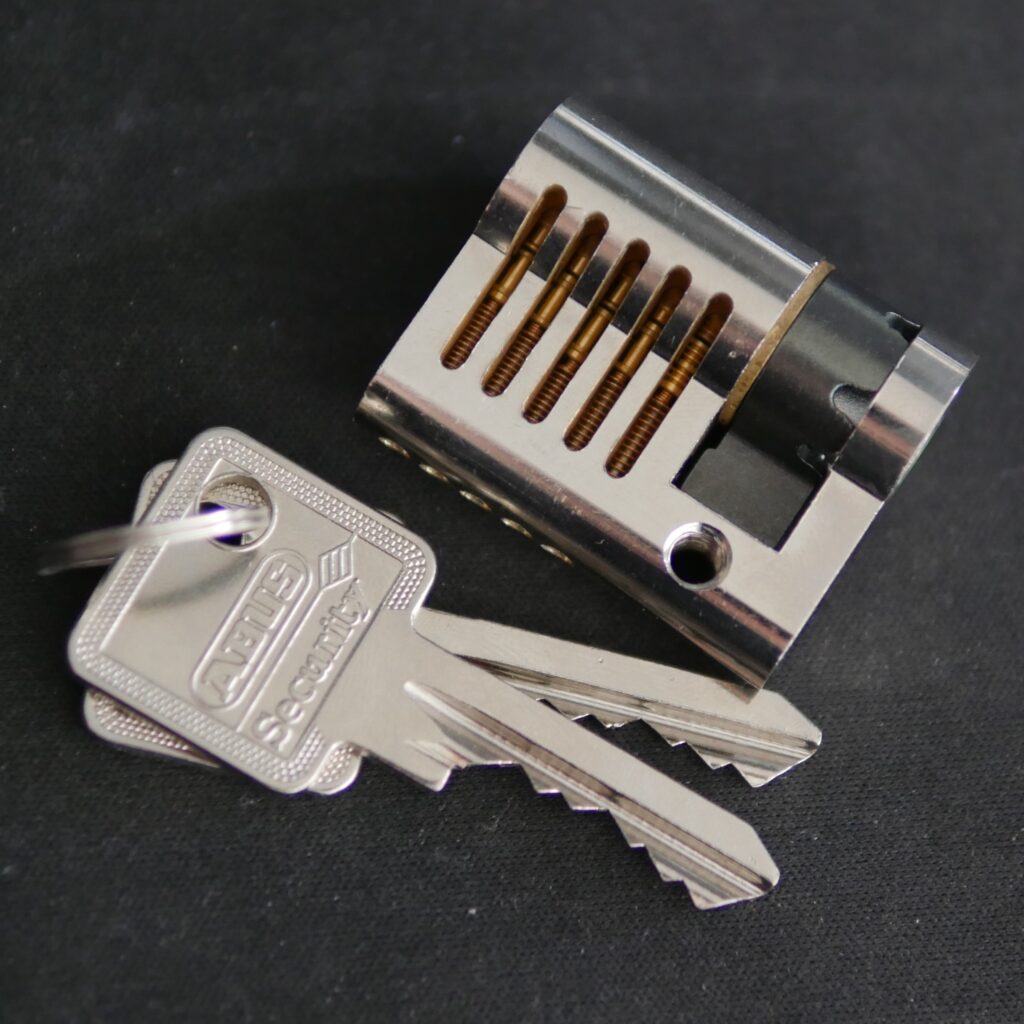
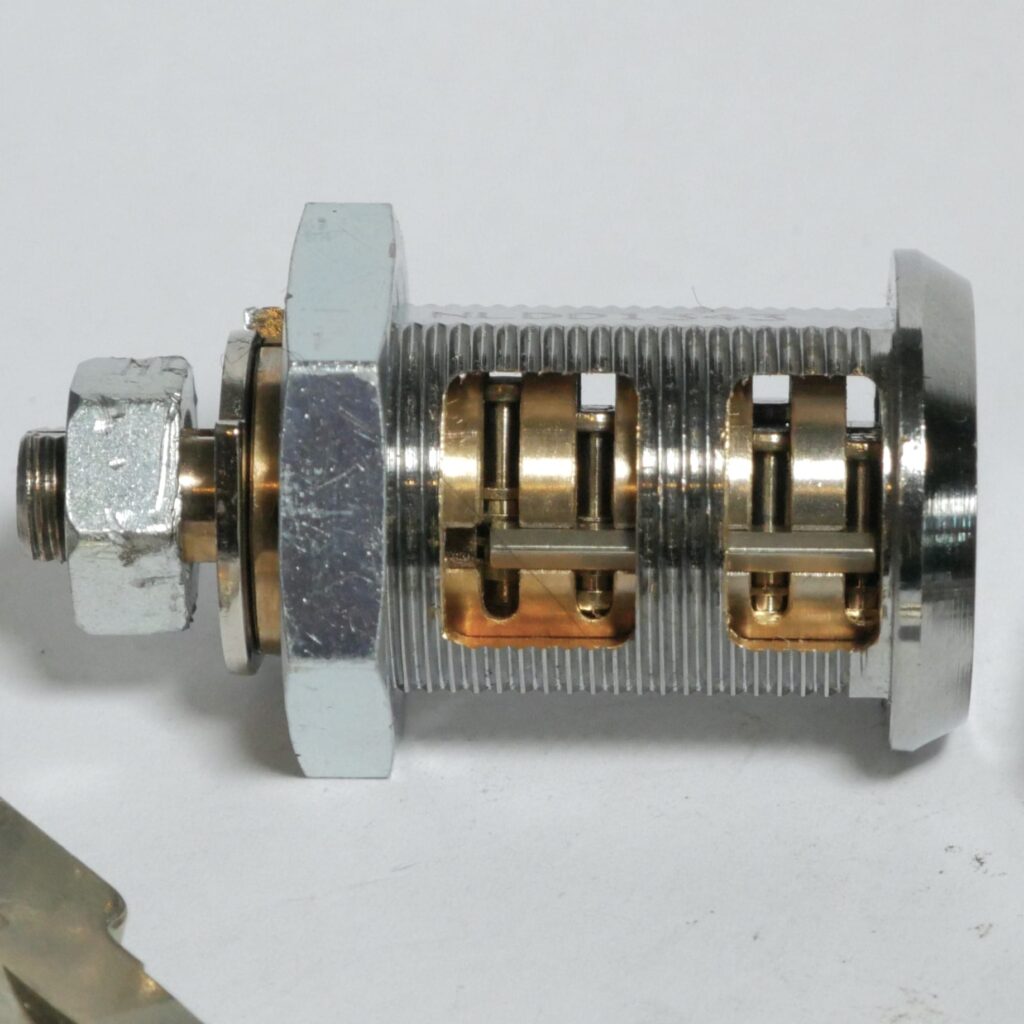
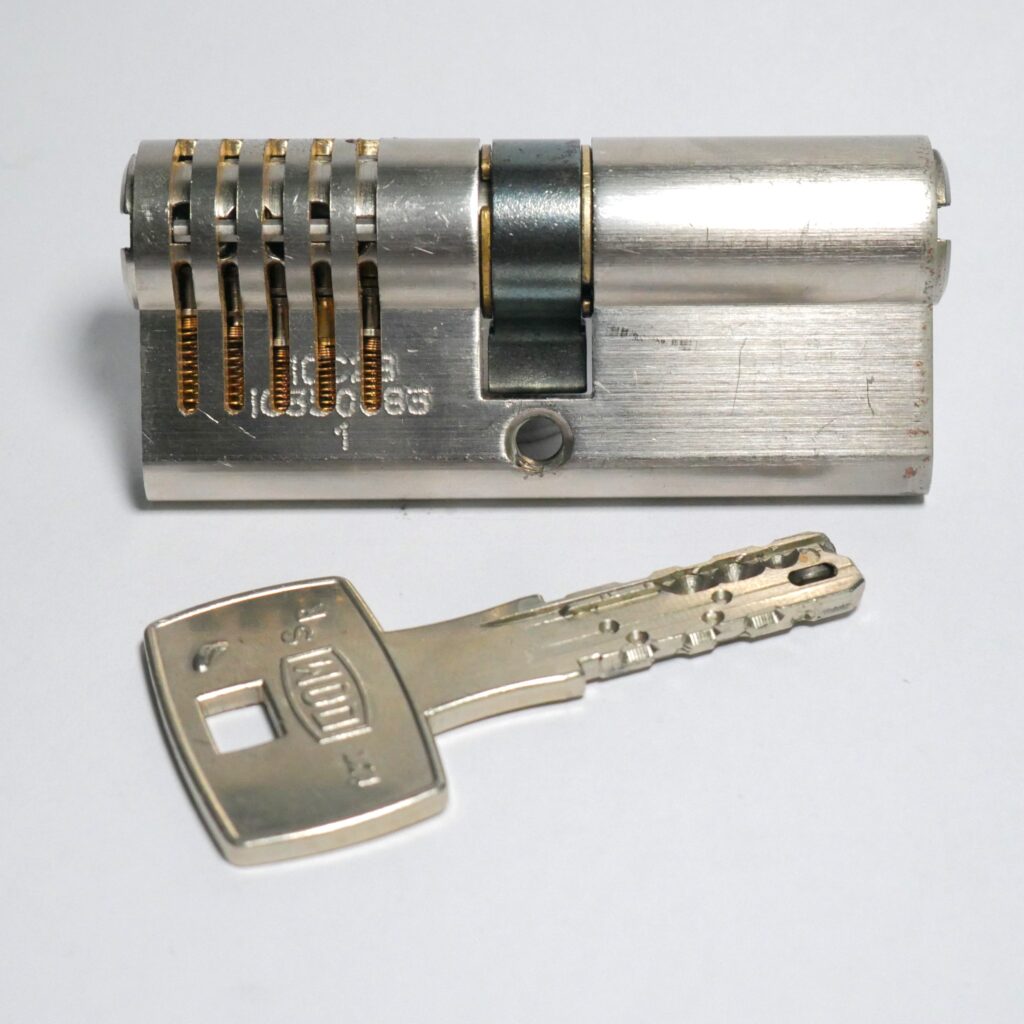
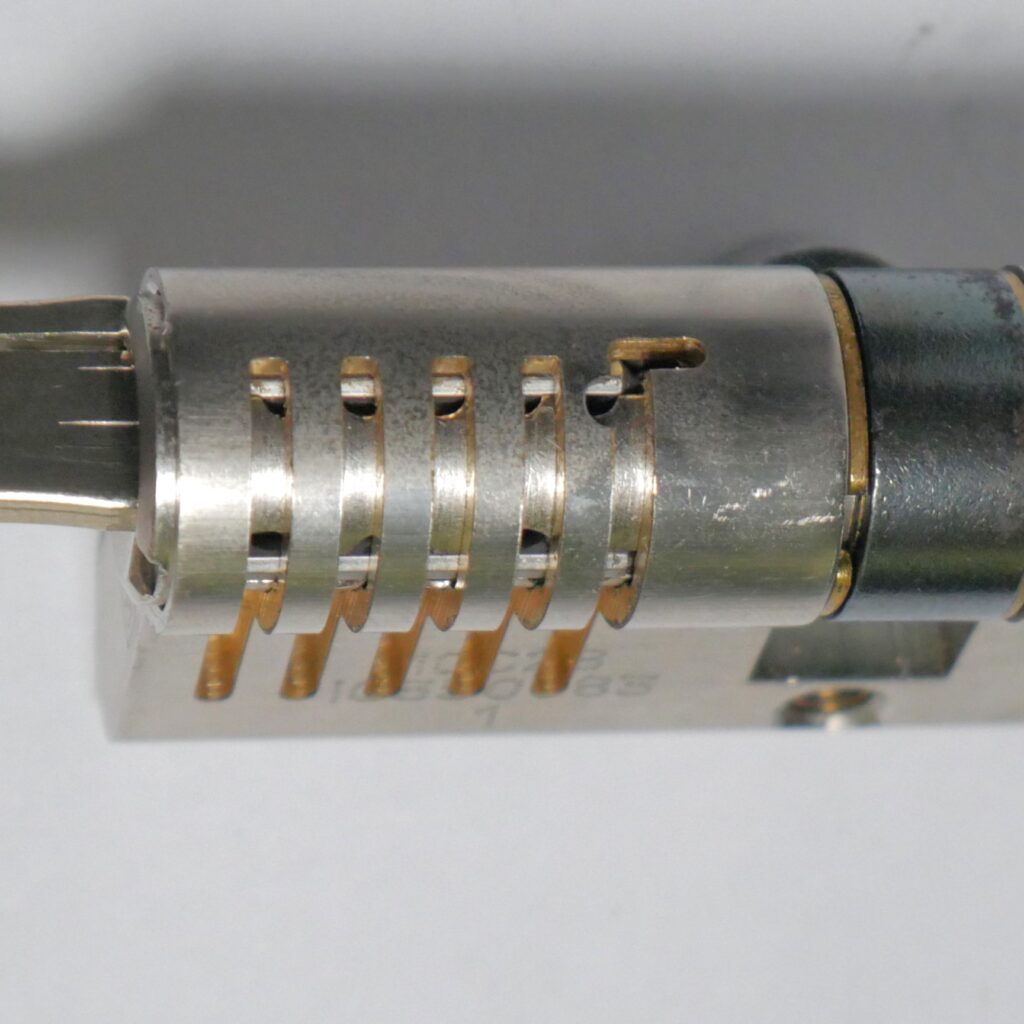
After cutting these cylinders, it didn’t take long before I wanted to try some more challenging ones. I got myself some locks with more and tougher pins and basically did the same thing as with the 4-pin cylinders. A Baton 5-pin, a 3-pin Mul-T-Lock, and an Abus C83N.

The first padlock
After cutting some fairly simple brass cilinders i wanted to step it up a bit again. Next challege: padlocks. To do this i got my hands on some Kasp 14040 padlocks. Cutting aluminium turned out to be a bit more challenging than brass.


A new machine
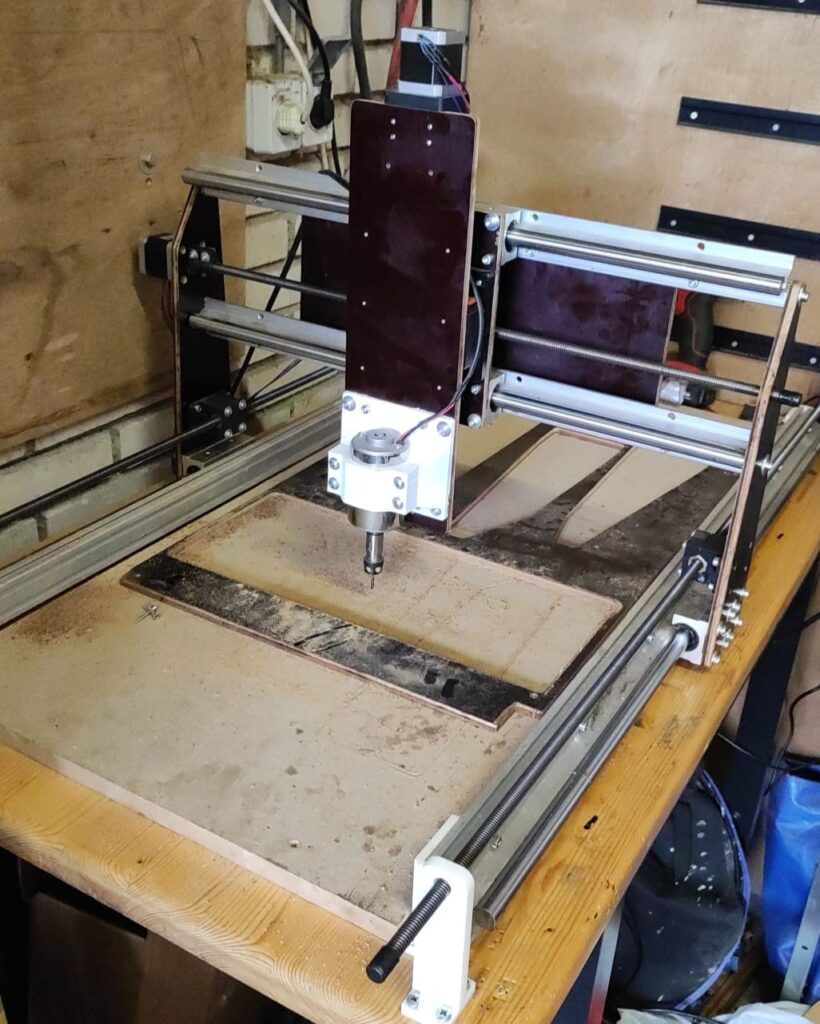
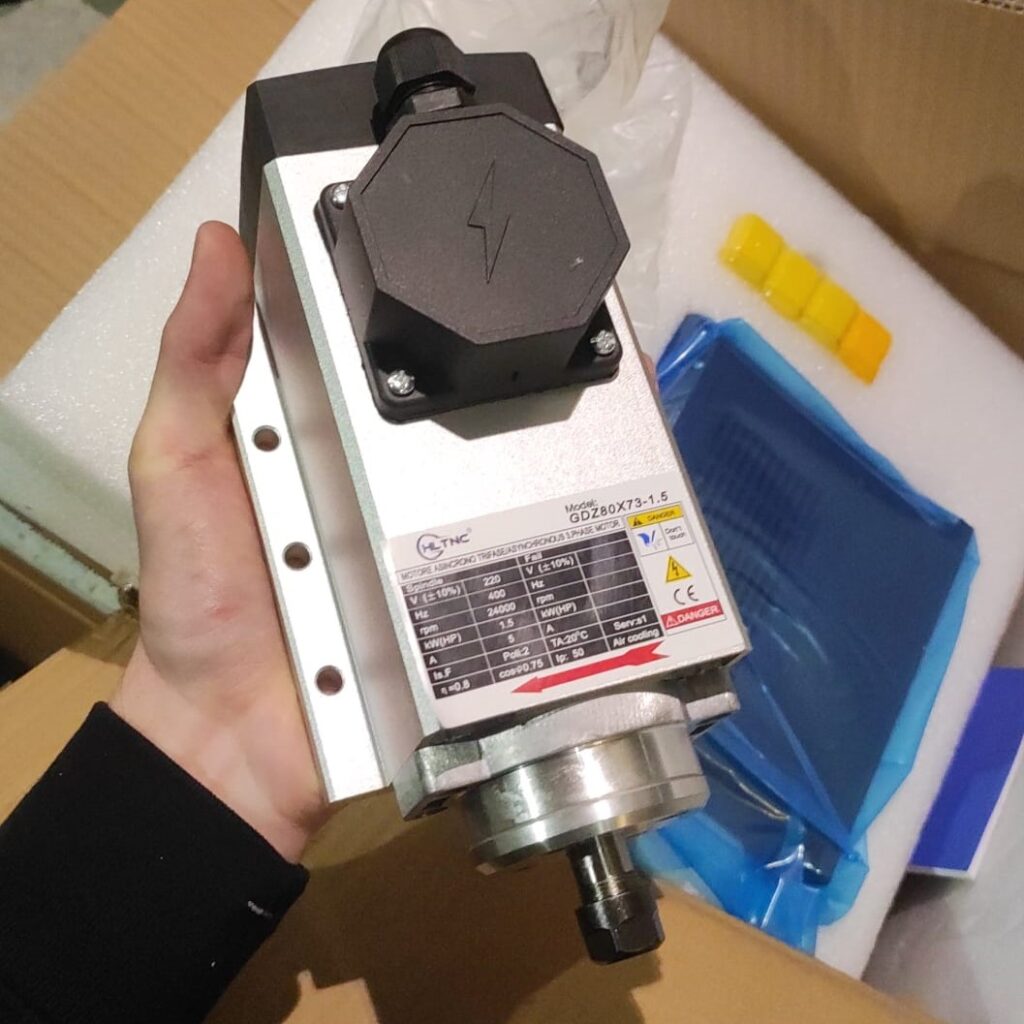
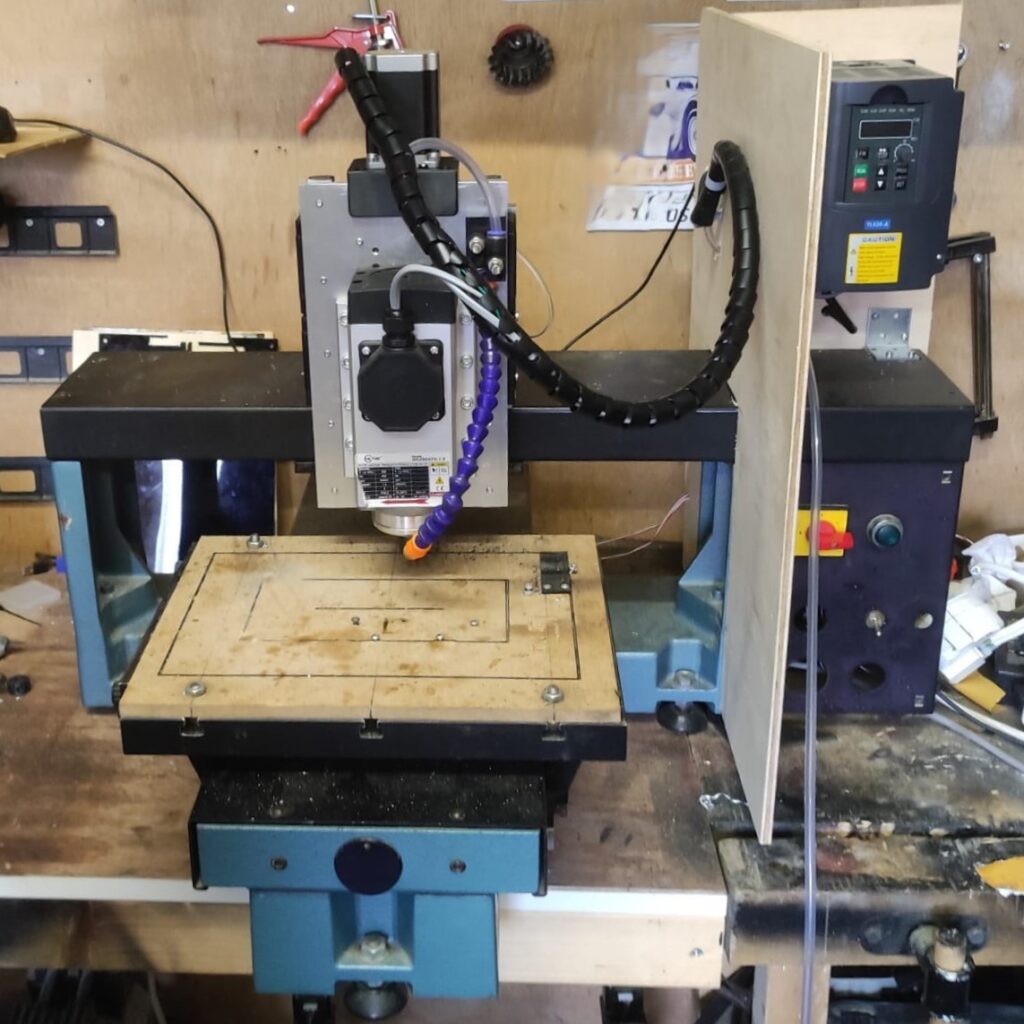
Although my first CNC machine did its job, it still had some limitations. It was hard to square properly, the spindle had no real RPM control, the bed was difficult to work with, and the machine had some minor deflections when cutting metal. So, when I got a call asking if I wanted to pick up an old engraving machine, I was stoked.
This machine was really old and heavy—but with mills, heavy is good. When I picked it up, it came with a very large electronics cabinet and an old MS-DOS computer. The man I got it from warned me to keep the clock speed of the MS-DOS computer at 50%, as the machine couldn’t connect with it otherwise. This obviously wasn’t practical for me, so I ended up swapping out the electronics for something more modern.
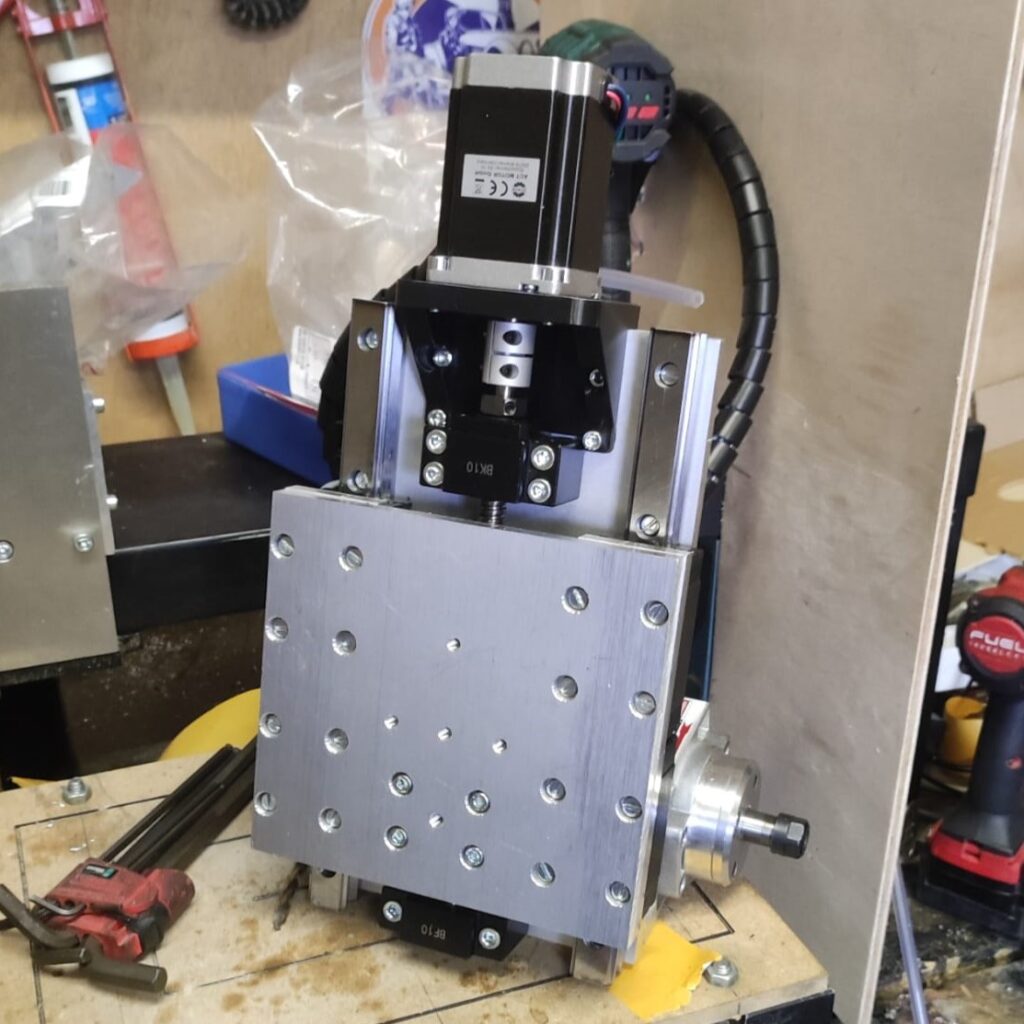
Another issue with the machine was the lack of a true Z-axis. It had a pneumatic Z-axis that was either engaged or disengaged—no in-between. I designed a new aluminum Z-axis and bought a proper spindle with a VFD to go with it. My old machine helped out with milling the necessary parts, and I was really pleased with the result. With this machine, I’m now able to achieve much more precise and reliable results.
Trying out different designs
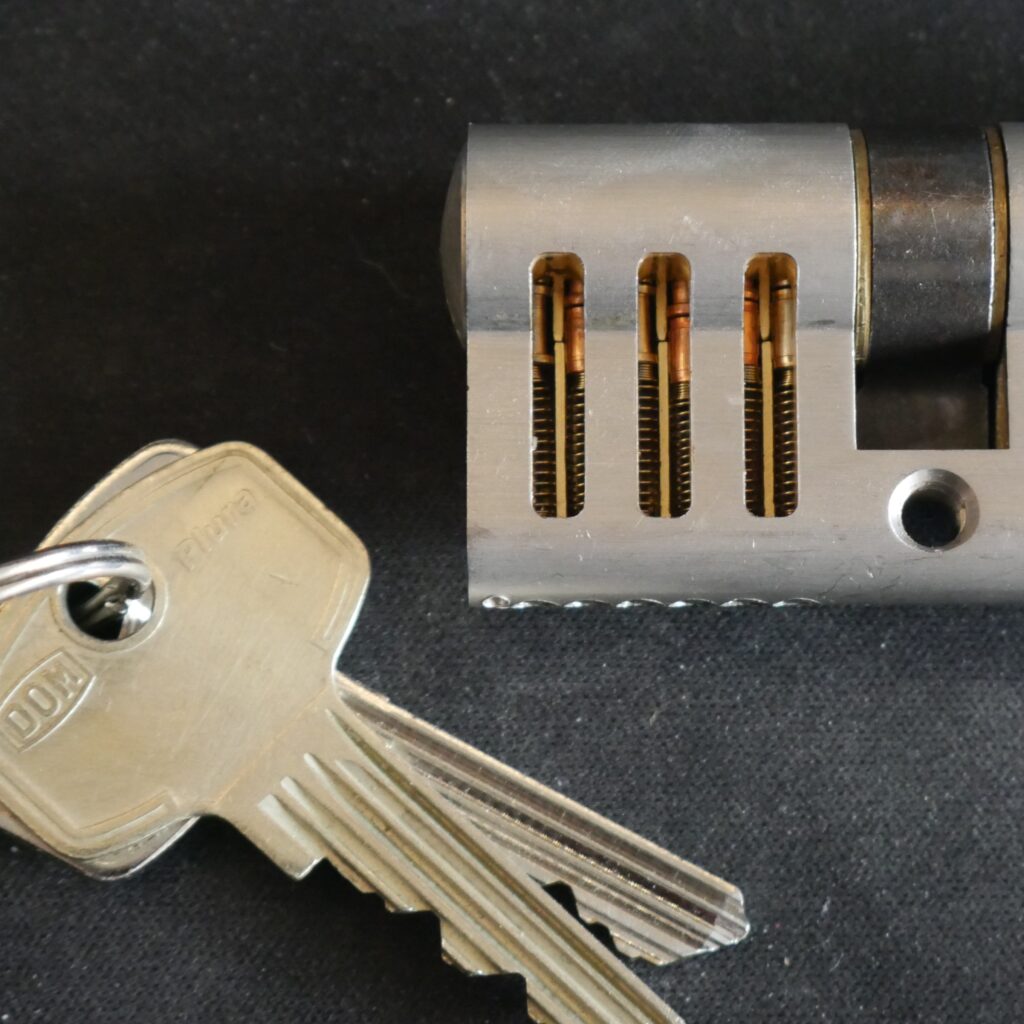
With my new machine, I started exploring different designs. The improved flexibility and accuracy opened up more possibilities. I began with the DOM Plura. Since this lock has six pins, it can be cut with three larger slots covering two pins each, instead of one slot per pin. The increased precision helped with properly centering the slots and resulted in a much better surface finish.
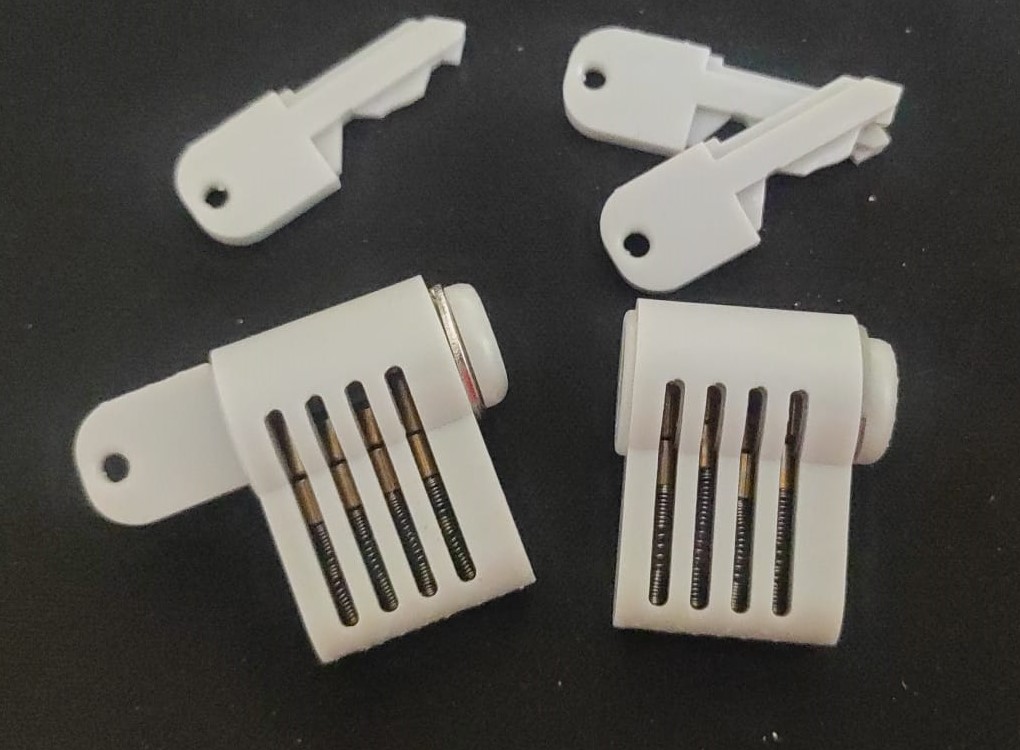
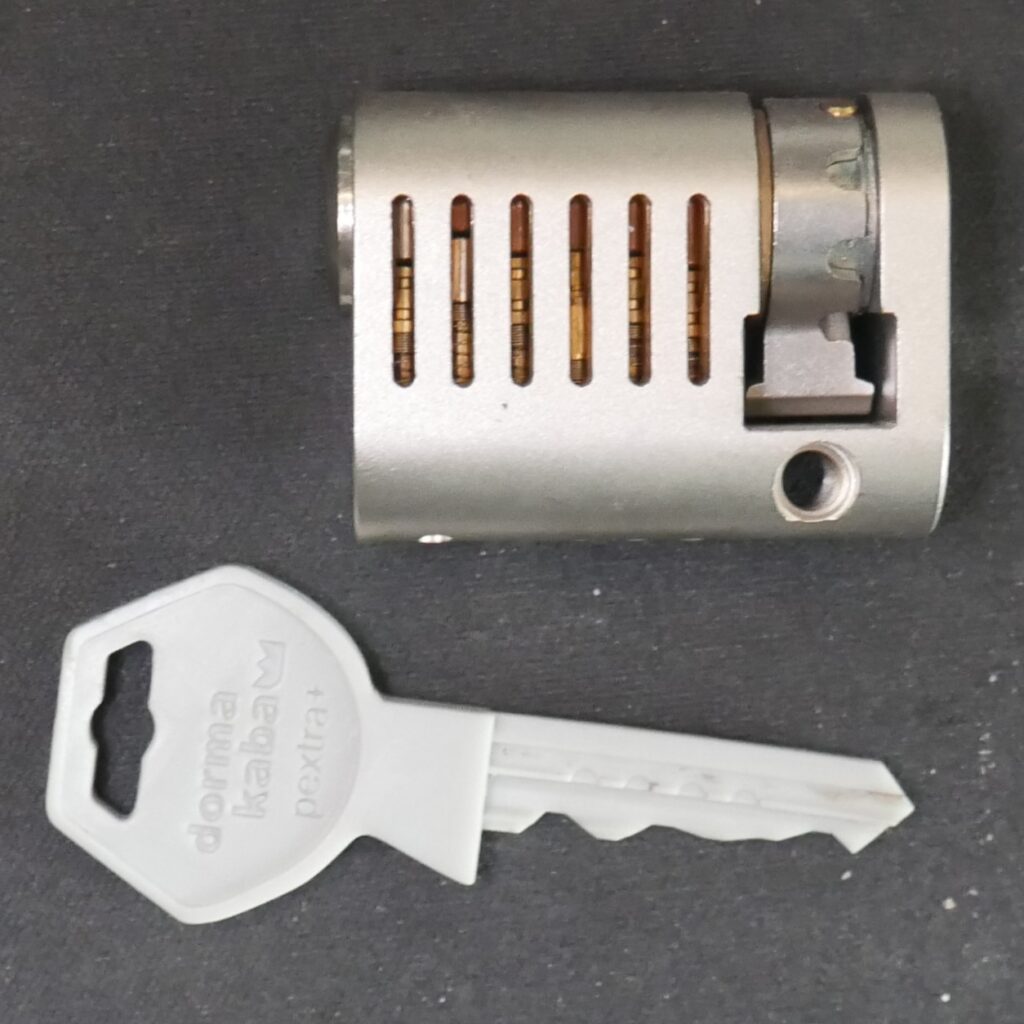
Seeing how much the accuracy had improved, I wanted to give the Pextra a try. I was able to get several of them, but they came without keys. That’s why I started by 3D printing a key for it. The main challenge in cutting this lock was the hardened steel anti-drill pins located near the pin stacks. I had to make the slots fairly small and ensure everything was perfectly aligned. In the end, it all turned out pretty well.
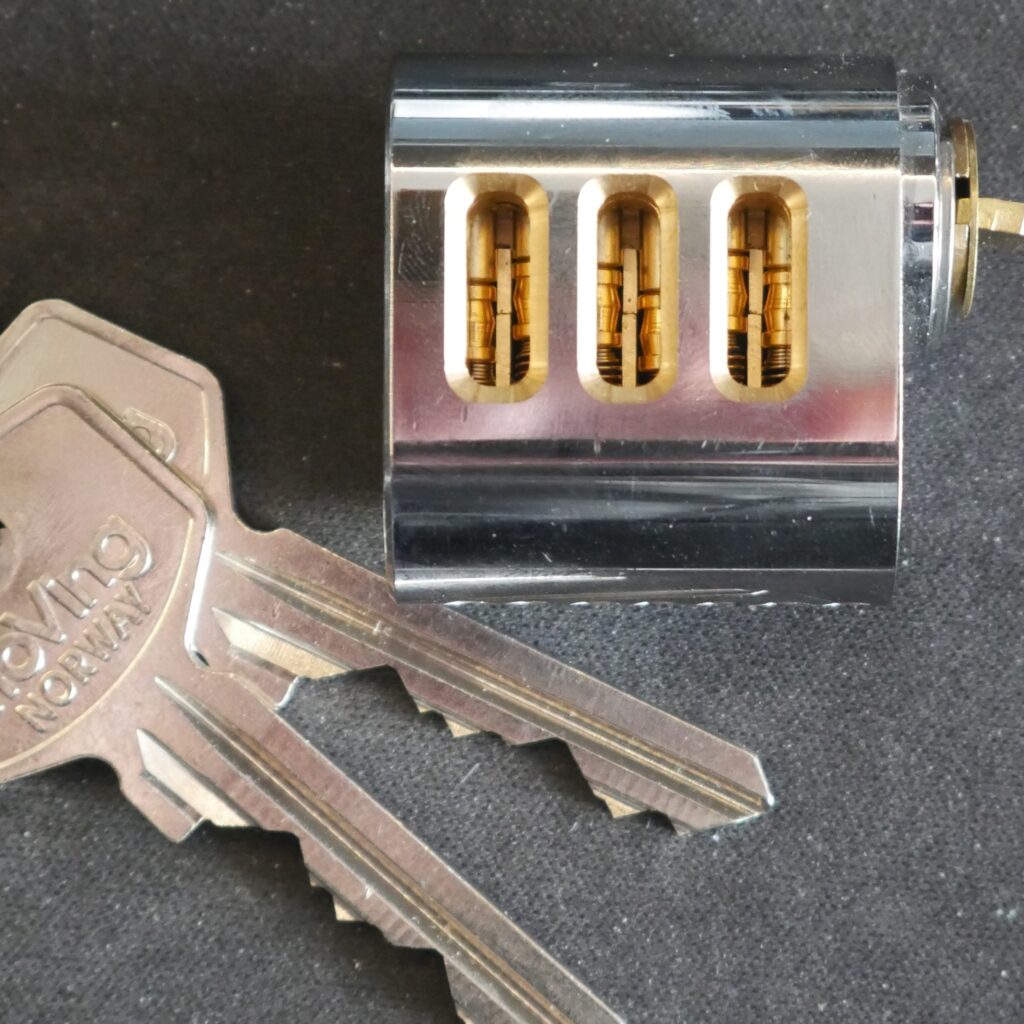
Encouraged by how the Plura cutaway turned out, I wanted to apply the same design to the TrioVing 55xx. This time, however, I decided to chamfer the edges for an even cleaner surface finish and to allow more light in for better visibility.
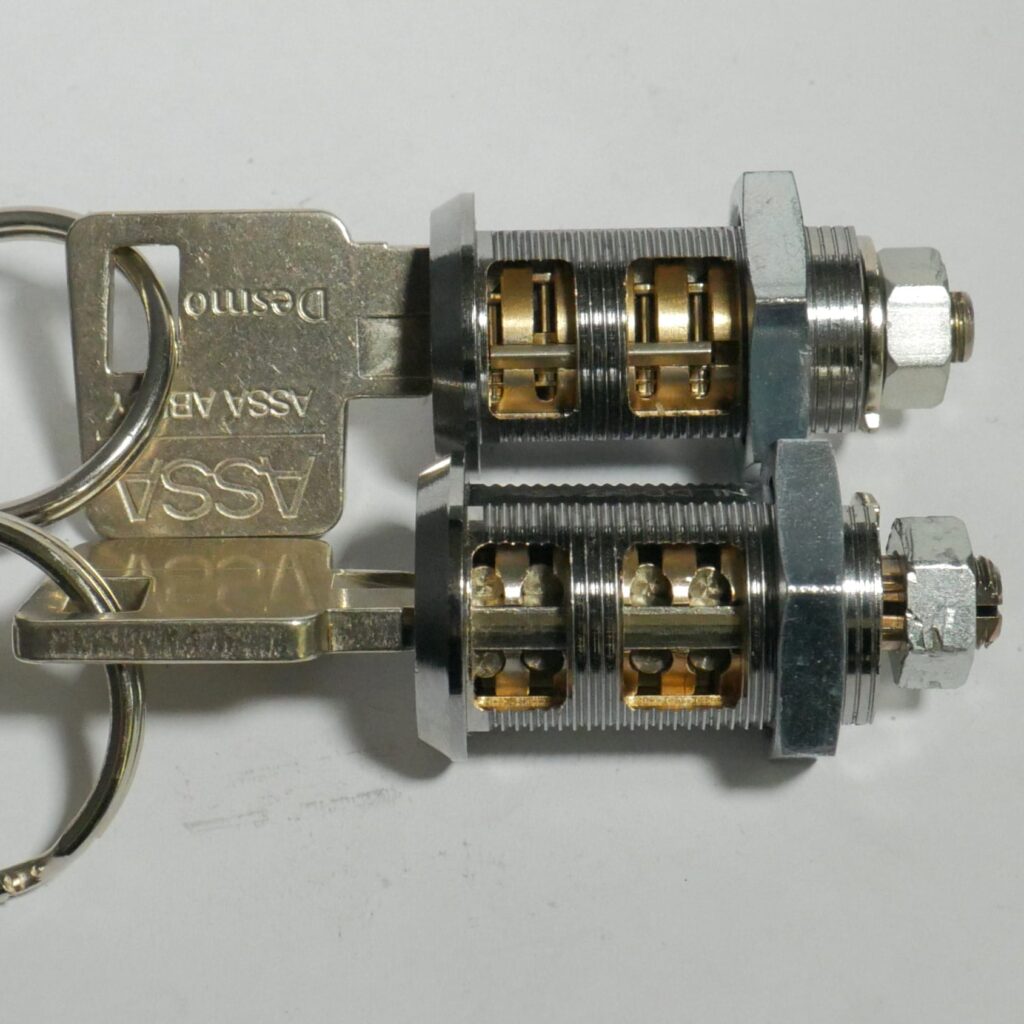
Assa Desmo
After doing mostly pin tumbler cutaways, I wanted to branch out into other mechanisms. At the time, I had some ASSA Desmo cams lying around. The sidebar design of this lock was something I was particularly interested in seeing in action. I designed a 3D-printed clamp to hold the parts securely on the machine. For this design, I cut the core and the cam separately. A window in the cam and some slots in the core to reveal the sliders.

Dom IX 6 SR
The DOM IX 6 SR is also a lock with a lot going on. The ones I had were fully loaded, which meant pin stacks, passive balls, side and top pins, and of course, the interactive element. With my design, I wanted to make all of this visible—while still keeping the lock functional. That meant I had to come up with a design that could reveal everything without compromising the lock’s operation.
To start, I created a digital model of the lock so I could experiment with virtual cutaways. I color-coded the different components to better visualize how they interacted. Once I settled on a design, I drew up another 3D-printed holder and went ahead with the cutting process.
The result is awesome—it shows both sidebars and allows you to see the interactive element engage with the top bar.
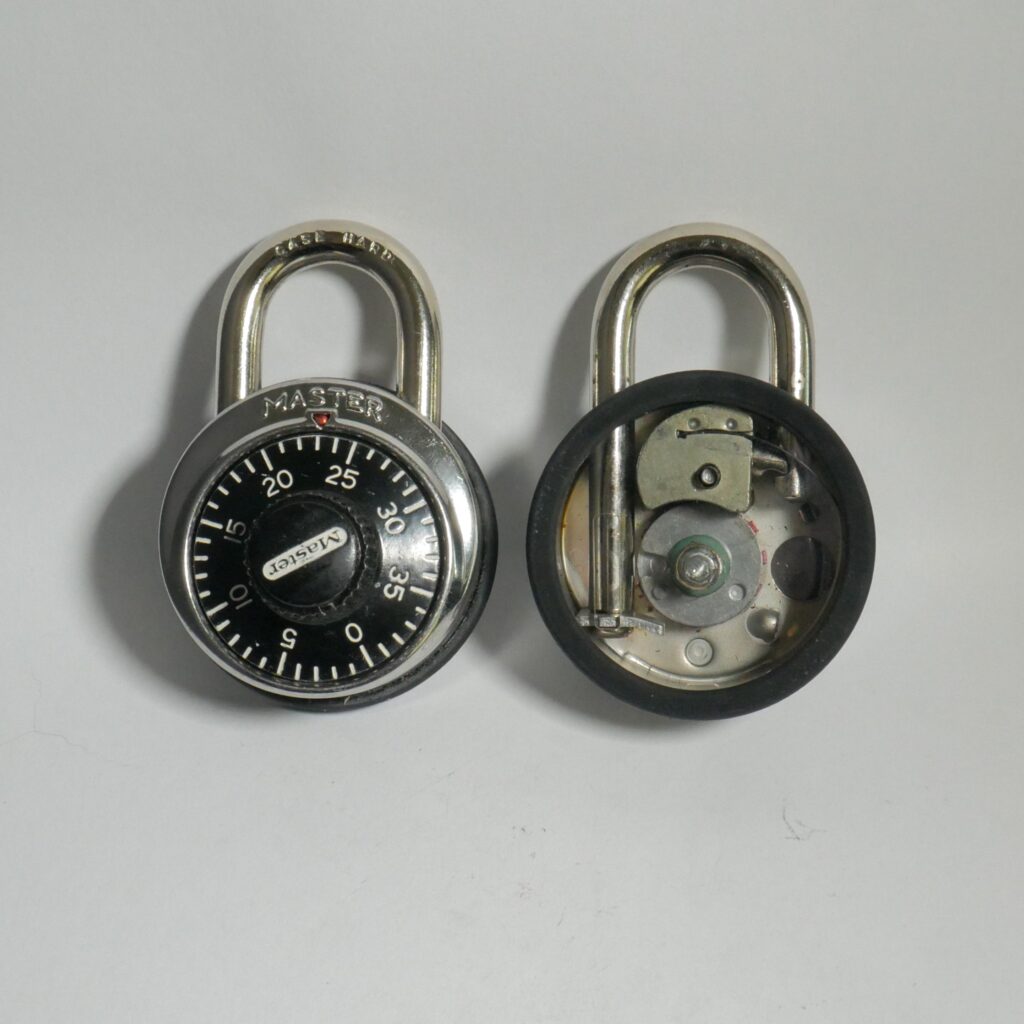
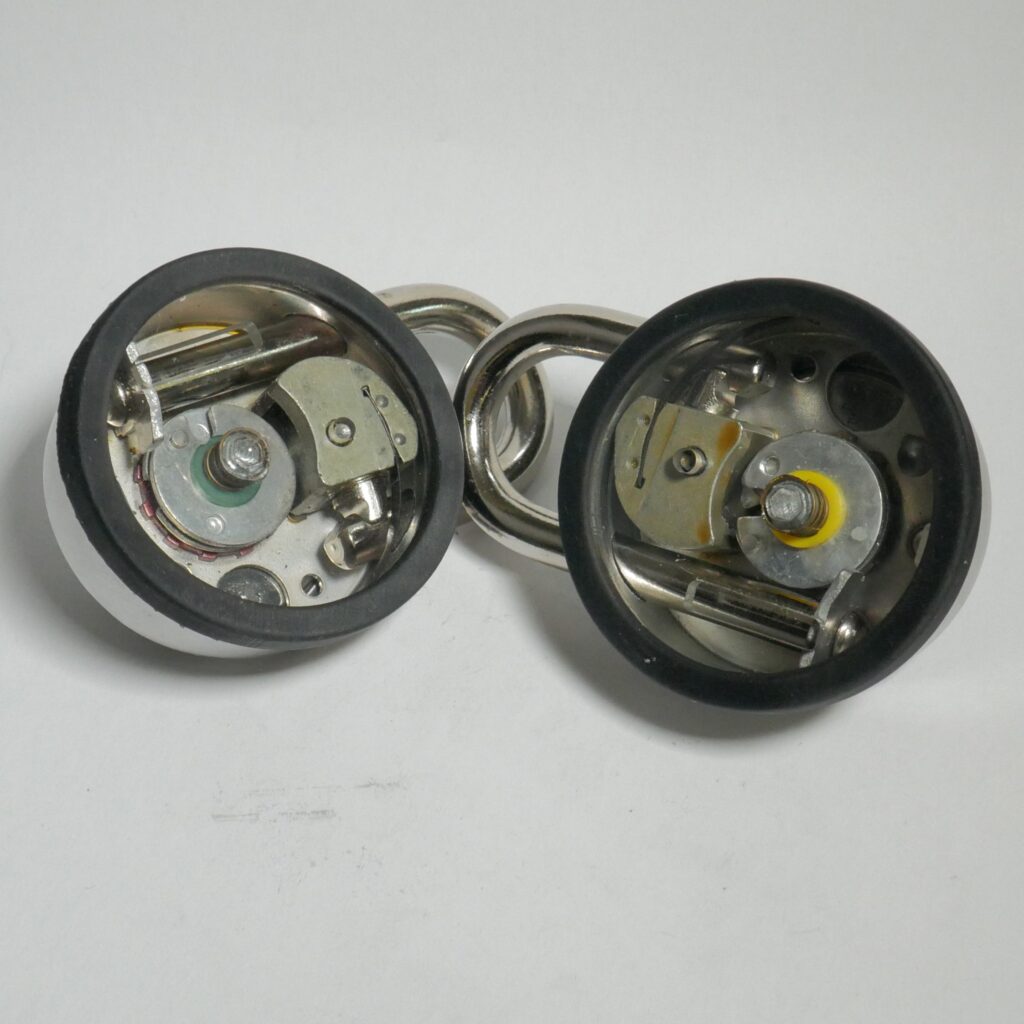
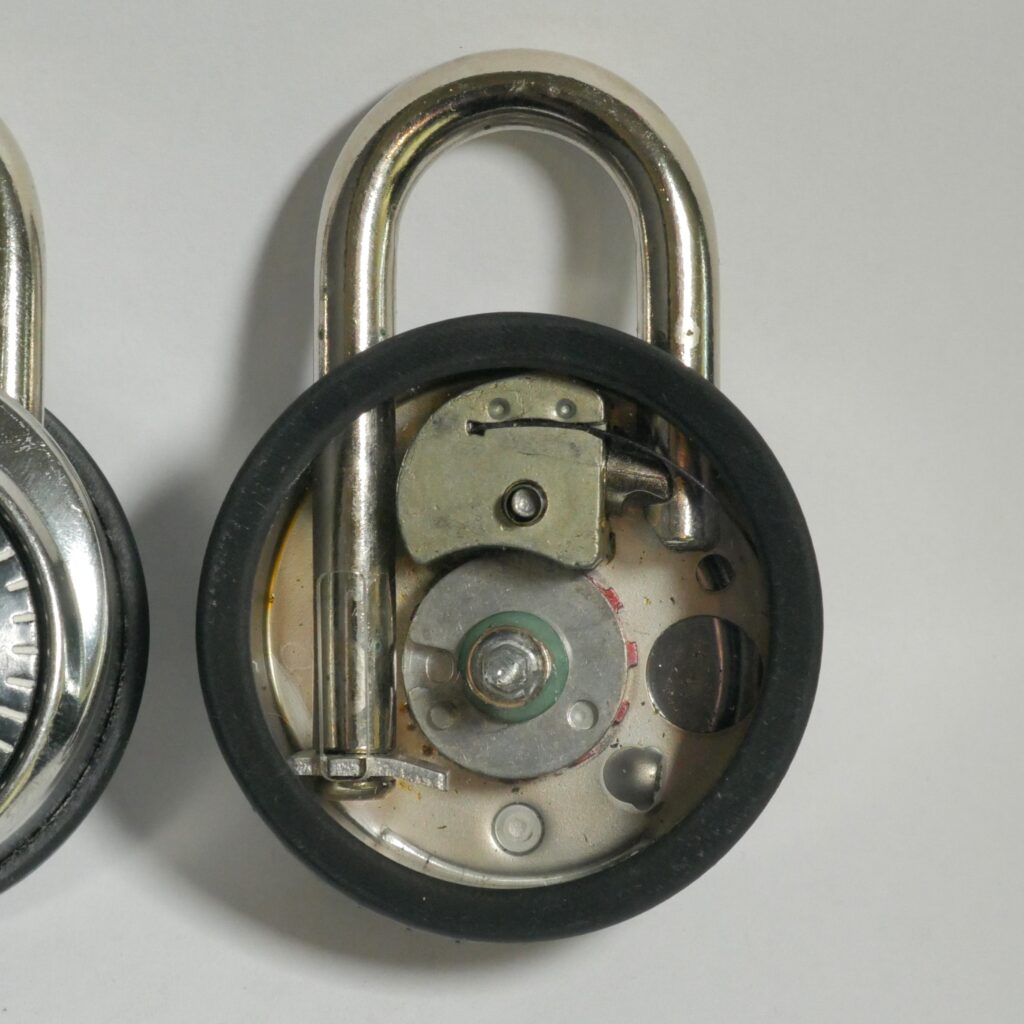
Master 1500
The Master 1500—a well-known classic. But how does the mechanism actually work? When I got my hands on some new old stock, I decided to cut one open to find out. In doing so, I discovered that the backplate had some functional purpose and was difficult to cut in a way that would clearly show the entire mechanism.
Instead, I decided to cut a new backplate out of acrylic. This way, it could perform the same function while being completely transparent, allowing a full view of what’s happening behind it. I ended up resin-printing some black rings that press-fit onto the lock to cover the sharp edges from cutting it open and to give it a clean, finished look.
Corbin Emhart
Looking at gutted pictures of the Emhart, I always found the lock fascinating. The internals feature very small details, and the interlocking pins always seemed to me like something that shouldn’t be commercially viable. So when I found a local seller offering a box of them, I bought them instantly.
Having multiple on hand—and being intrigued by their unique internals—I decided to attempt a cutaway. The first challenge was gutting them. The Emhart can only be gutted by removing the pins first. On my models, the chambers were sealed with press-fitted inserts, so I had to carefully mill those out without damaging the lock and replace them with grub screws before I could proceed.
Although the cutting process was really stressful—and my first attempt ended up slightly misaligned—I eventually got the hang of it and created a cutaway that remains one of my trophy pieces to this day.

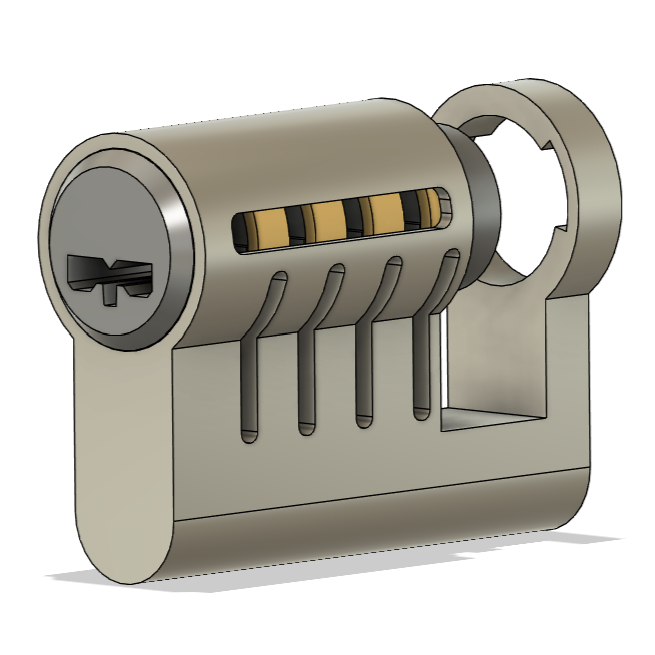
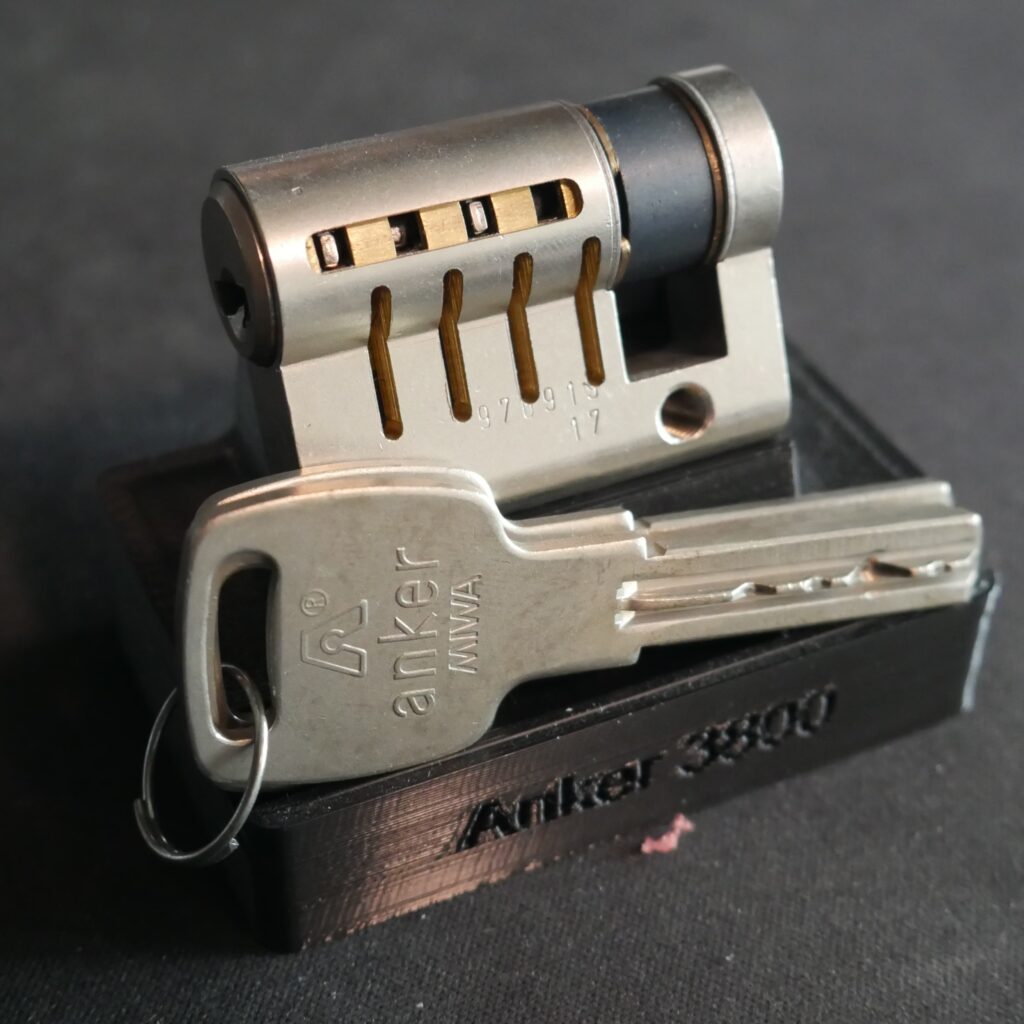
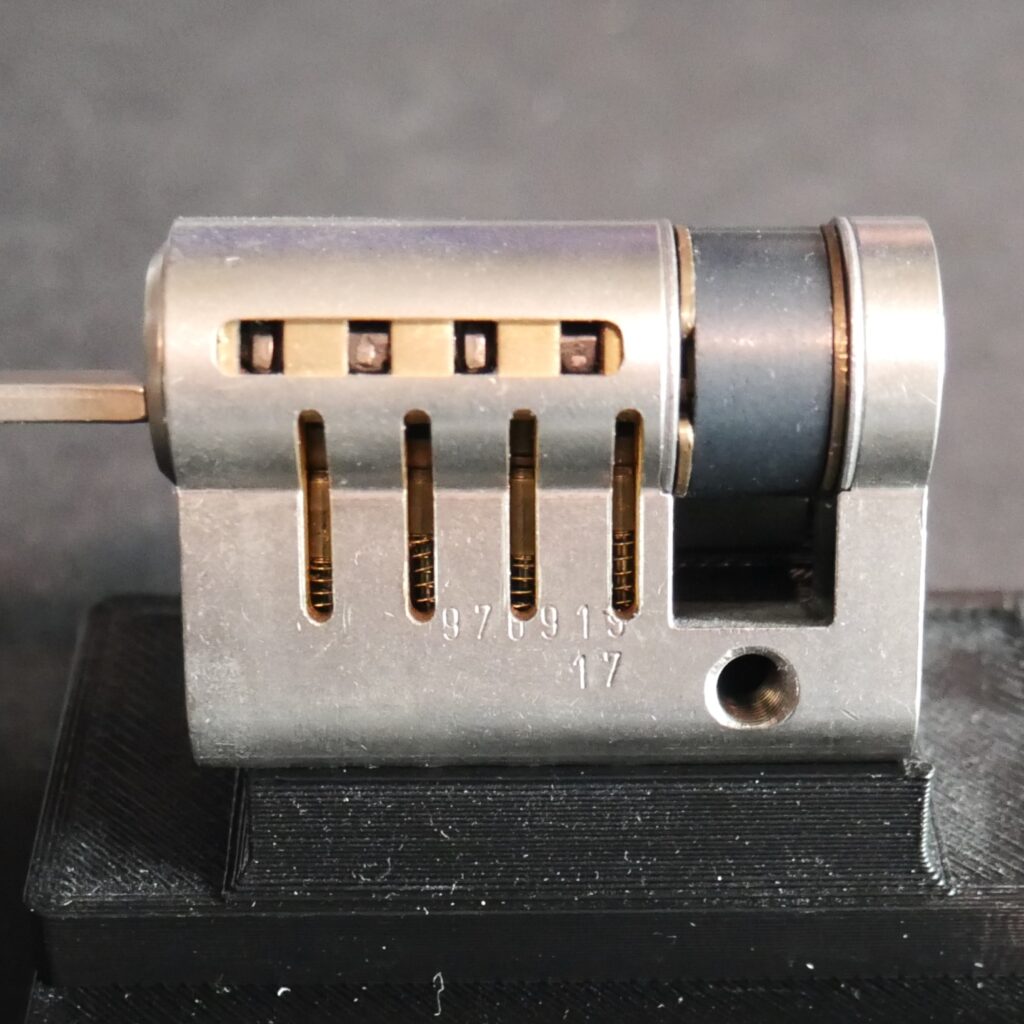
Anker 3800
Another interesting mechanism: magnets! In addition to the pin stacks, this lock also has four magnetic sliders. These sliders sit in a separate chamber above the key and can’t be physically reached. I wanted to show how the magnetic sliders interact with the key upon insertion.
Gutting these wasn’t as straightforward as I had hoped. Pulling out the core at the wrong angle can jam the lock—I learned that the hard way. Fortunately, I managed to salvage the lock by grub-screwing it. As usual, I started off with a digital design and then cut the lock to match that design.
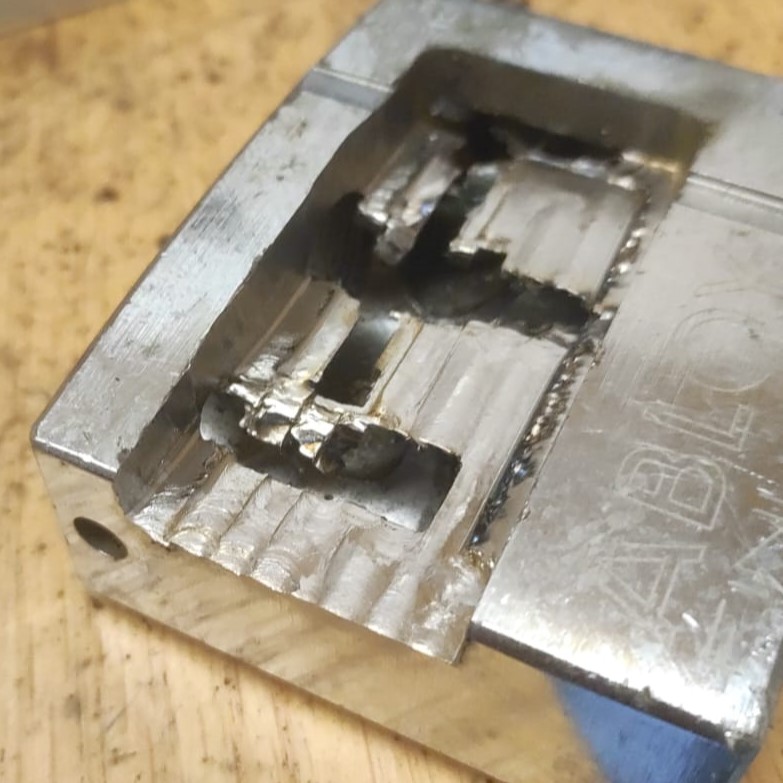
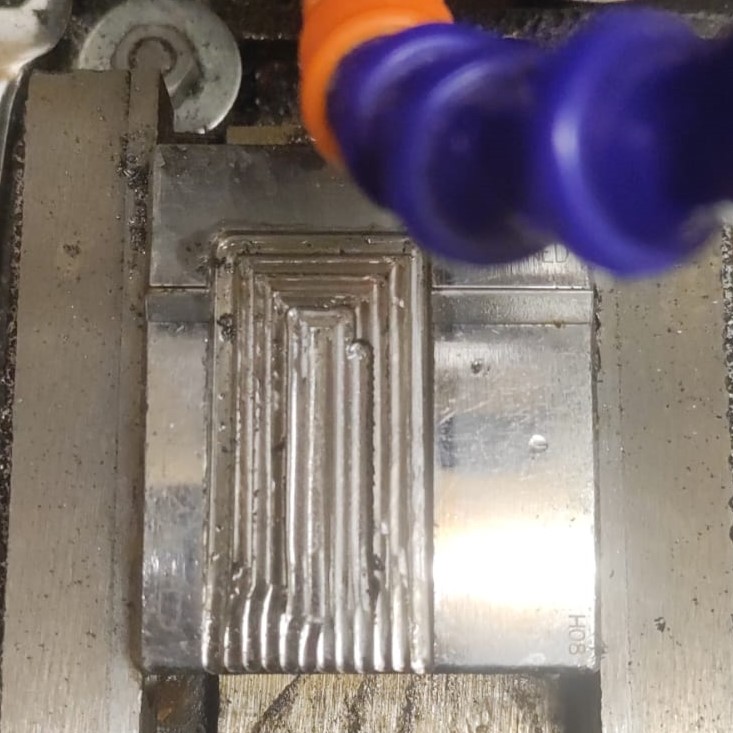
Abloy PL358
Abloy makes absolute beasts of padlocks. I knew it would be a tough challenge, but I wanted to give it a try. Abloy padlocks are made from case-hardened stainless steel, which means the outer layer of the body is hardened while the inside remains softer.
My spindle is air-cooled and has a minimum speed of 7000 RPM, which is quite high for cutting this type of steel. Hardened steel also requires special endmills. During cutting, you can clearly see the difference in how the hardened outer layer reacts compared to the softer inner core.
While I gave it a solid attempt, I eventually had to give up after breaking multiple endmills and realizing that my machine just couldn’t handle it with the current setup and settings.
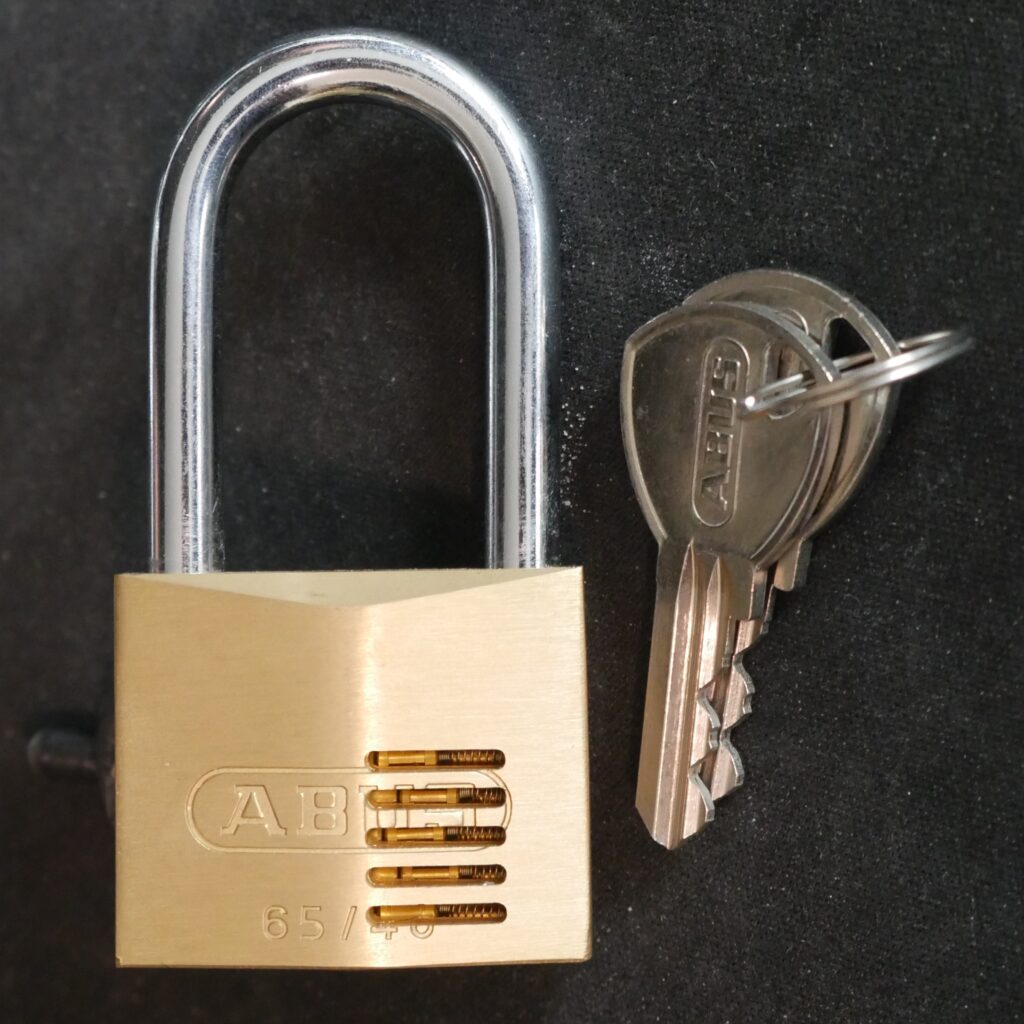
Abus 65/40
The Abus 65 is a lock that most of us—at least in Europe—have probably picked at some point. However, since it’s not guttable, there are very few photos available of its internals.
Having a few lying around, I decided to mill out the plugs and gut one. After completing the cutaway, I reassembled the lock and pressed in new brass plugs. I then sanded them down so the lock would look as close to the original as possible.
This is the result:
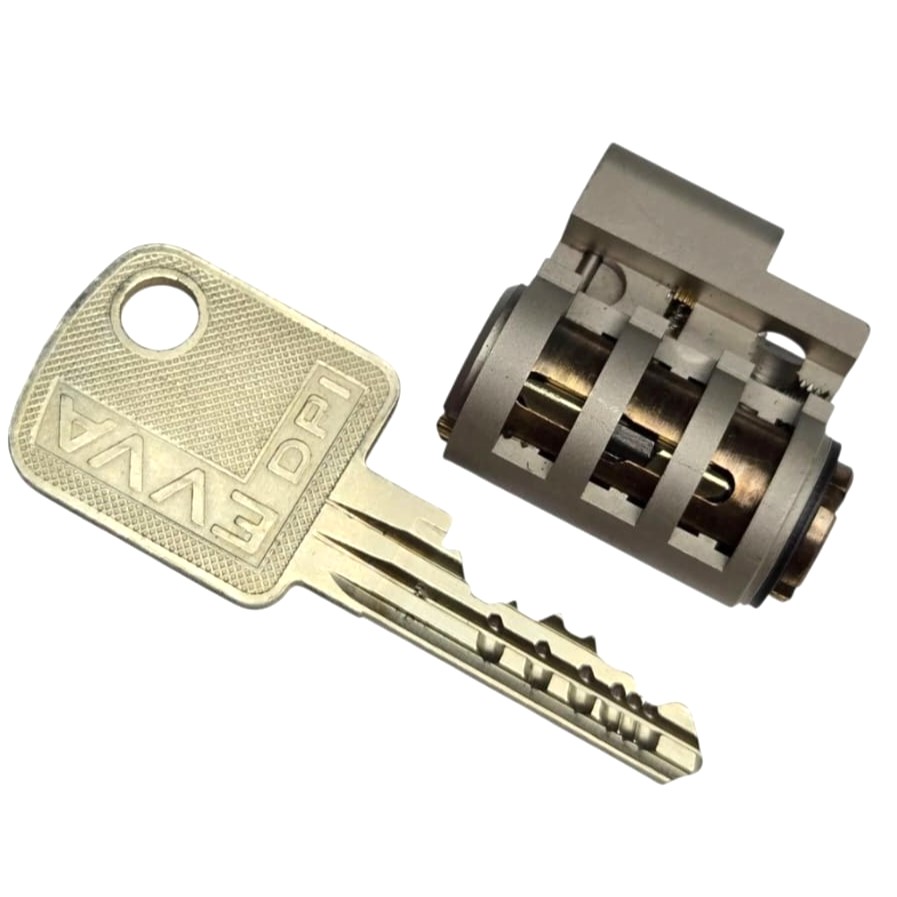
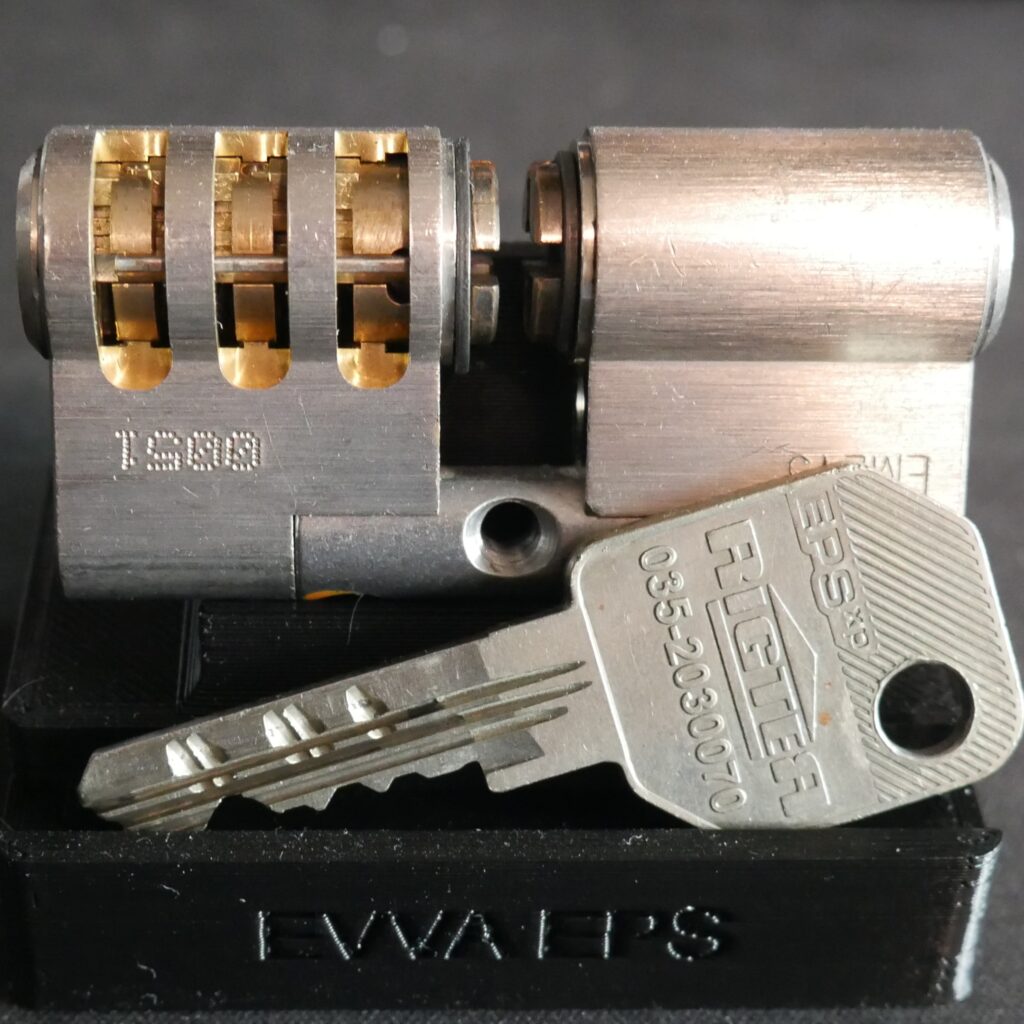
Evva EPS
Some one in the comunity showed me the EVVA factory cutaways that he had. i was impressed by all of them except for the standard DPI slider one (first picture). This original cutaway did not show the sliders themself when inserting the key and did not show the interaction with the sidebar either. Thats why i decided do do my own cuttaway of this lock. I cutted the other side and added small slits to see the sliders as well.

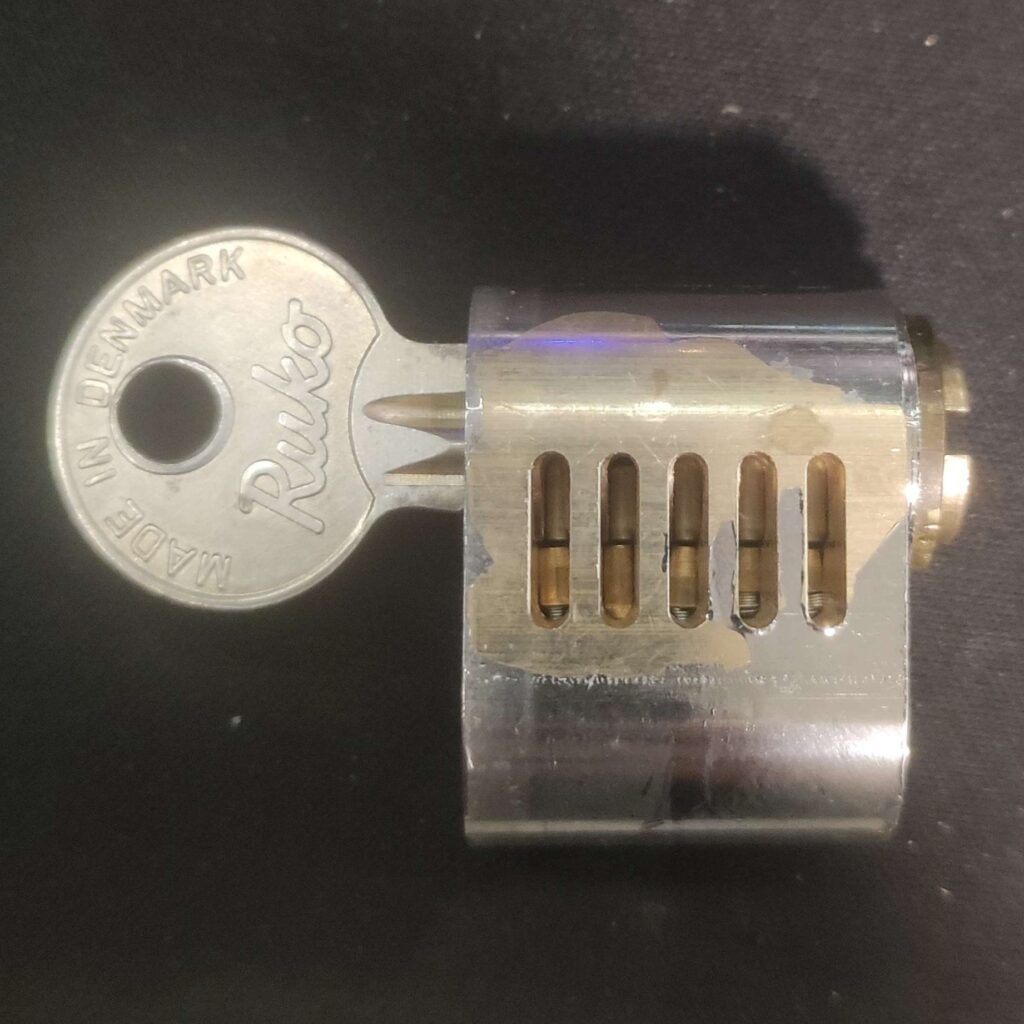
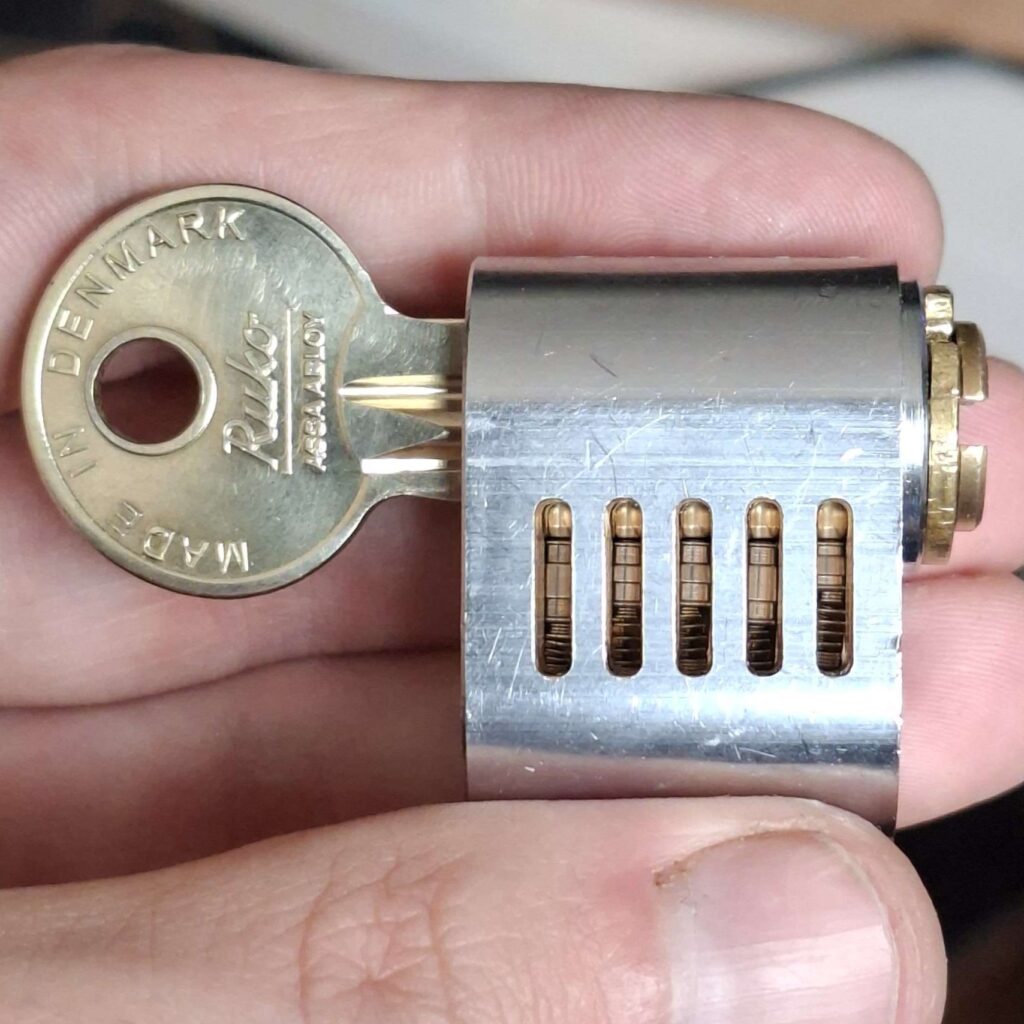
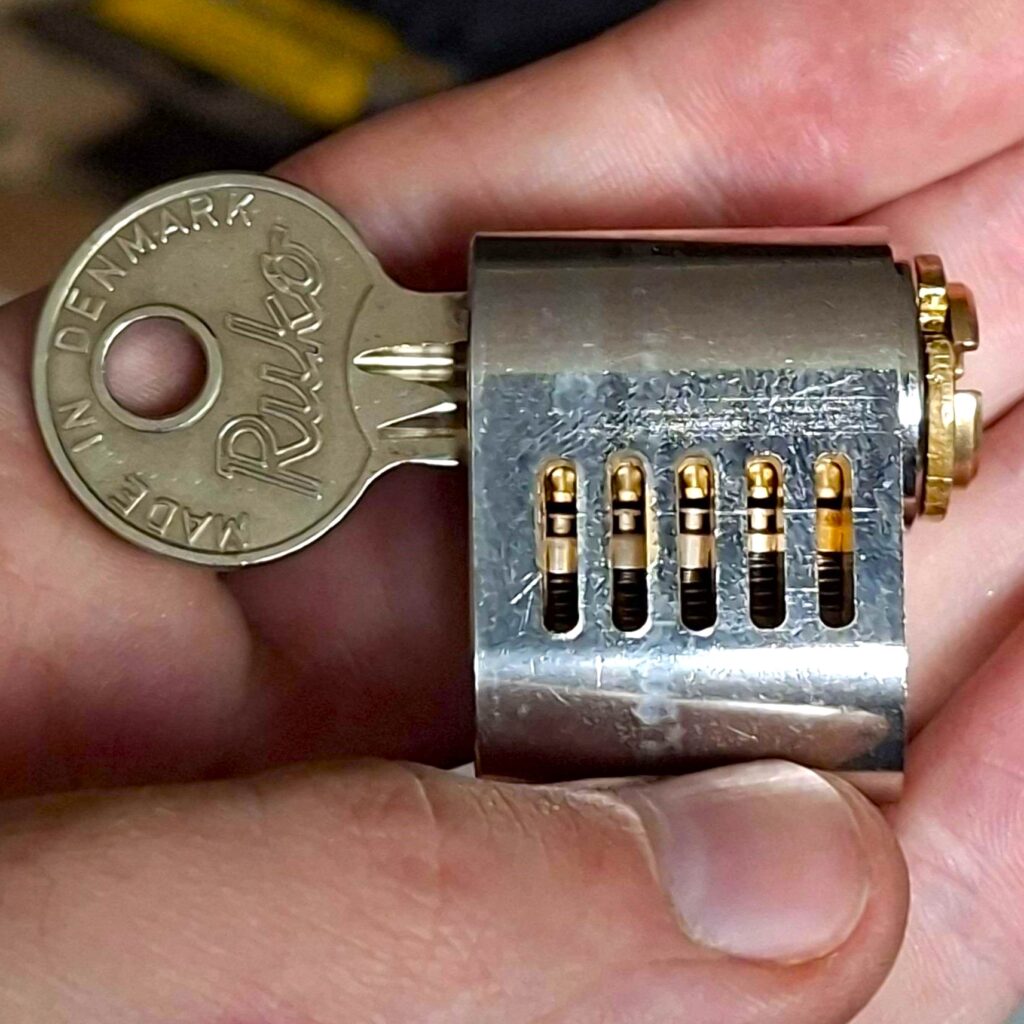
Ruko 500’s
I was approached by Grojcig to see if I’d be willing to make some cutaways of the Ruko 500 for him. Having done other oval profiles before, I expected it to be a fairly easy job. He included a few old lock bodies for me to practice on, which led to an unexpected discovery.
Unlike ASSA locks, the Ruko’s pin chambers are drilled at a slight angle. This threw off all my initial measurements. After carefully measuring, I found the angle to be 2.5 degrees—once I accounted for that, I was able to make accurate cuts.
Unfortunately, on one of the locks, the nickel plating came off the body, which made the cutaway a bit less visually pleasing.
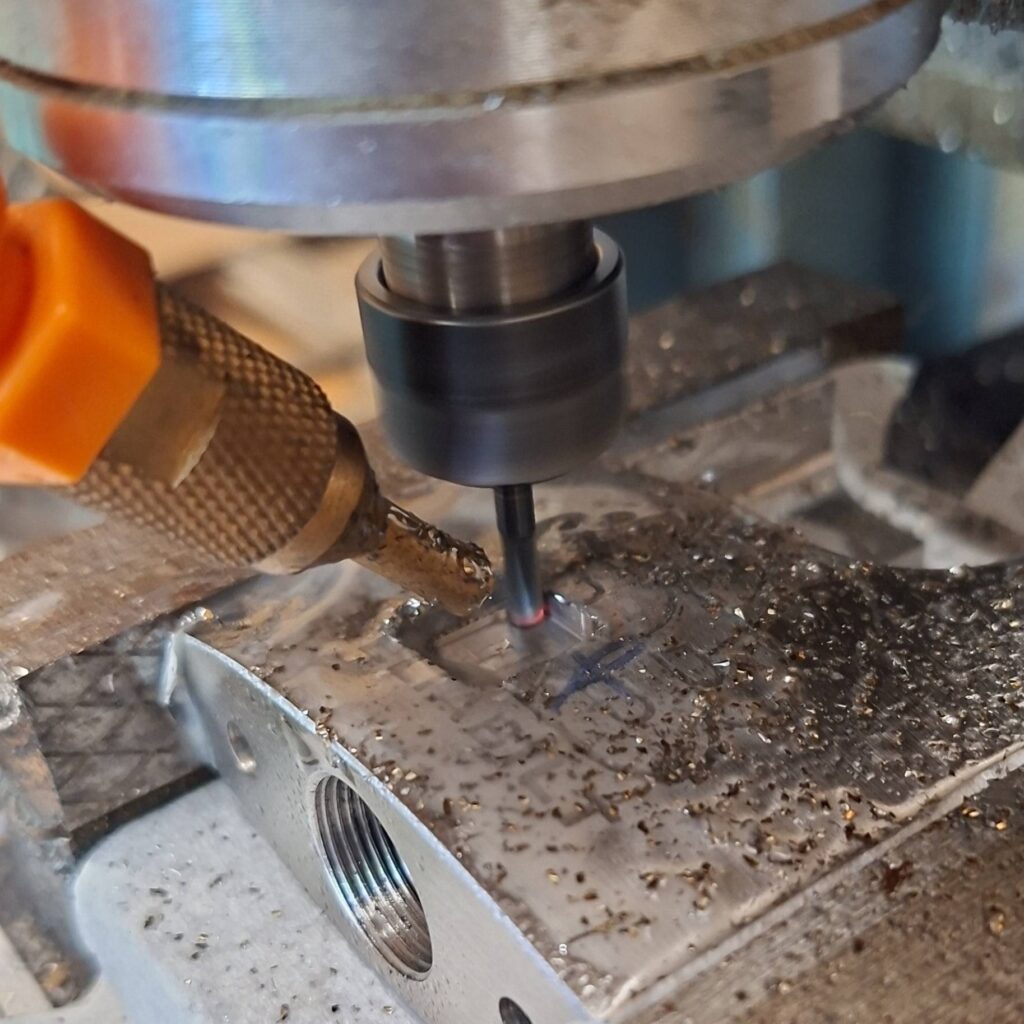
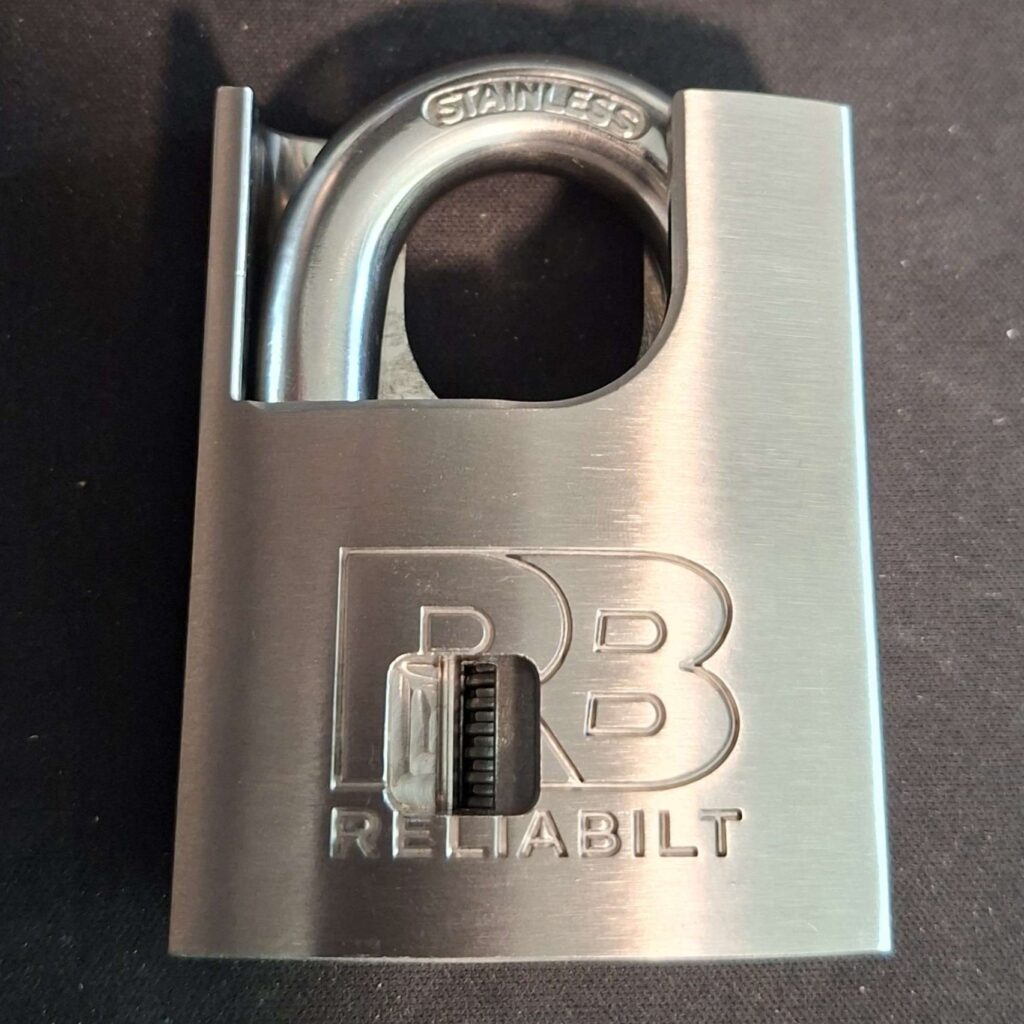
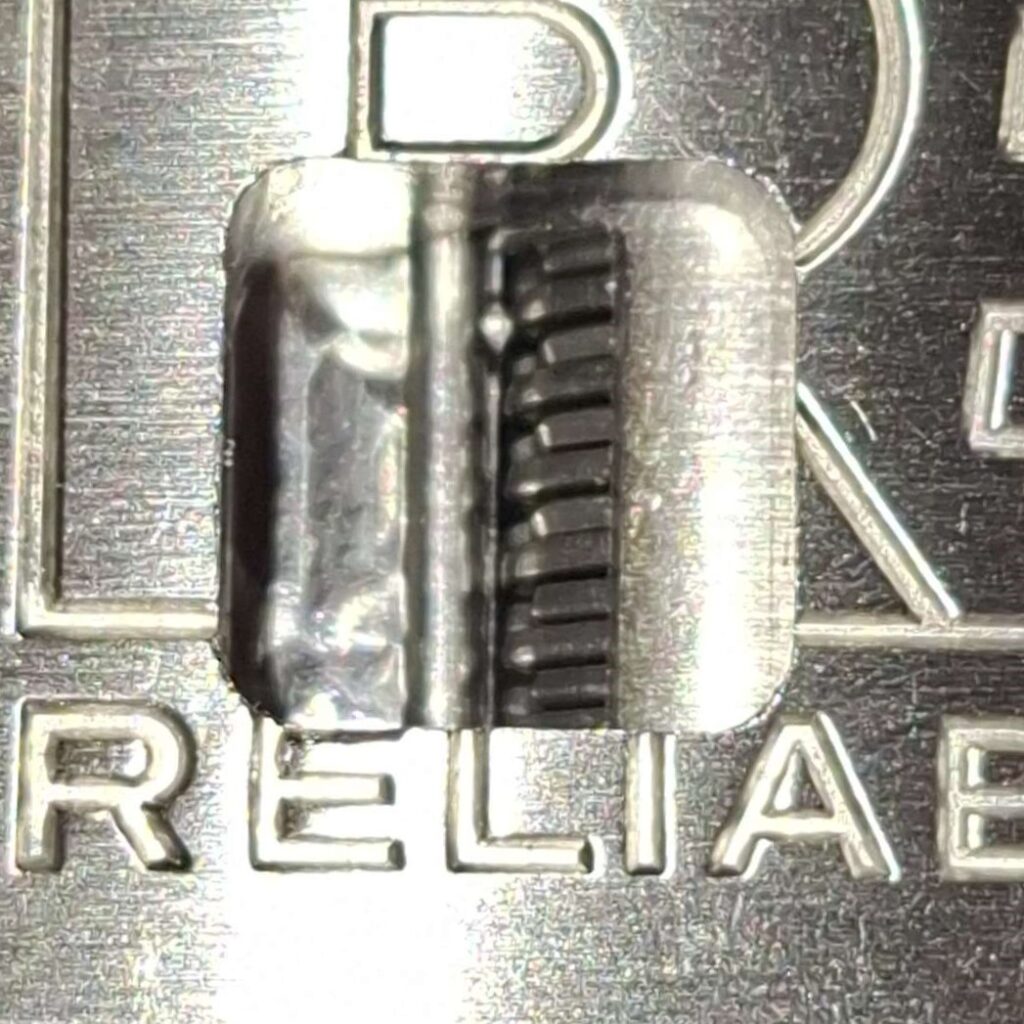
Reliabilt DD padlock
After completing the Ruko cutaways for Grojcig, he suggested doing Reliabilt padlocks as well. These padlocks contain the disc detainer locking mechanism which would be a first for me. Before purchasing them, we hoped they were nickel-plated brass, but they turned out to be stainless steel.
Even though I was a bit hesitant to cut them, given my previous experience with steel, we decided to go ahead anyway. Because of this, the design was kept fairly moderate. The cutting ran a bit hot, but with oil mist cooling, it ended up being a success.
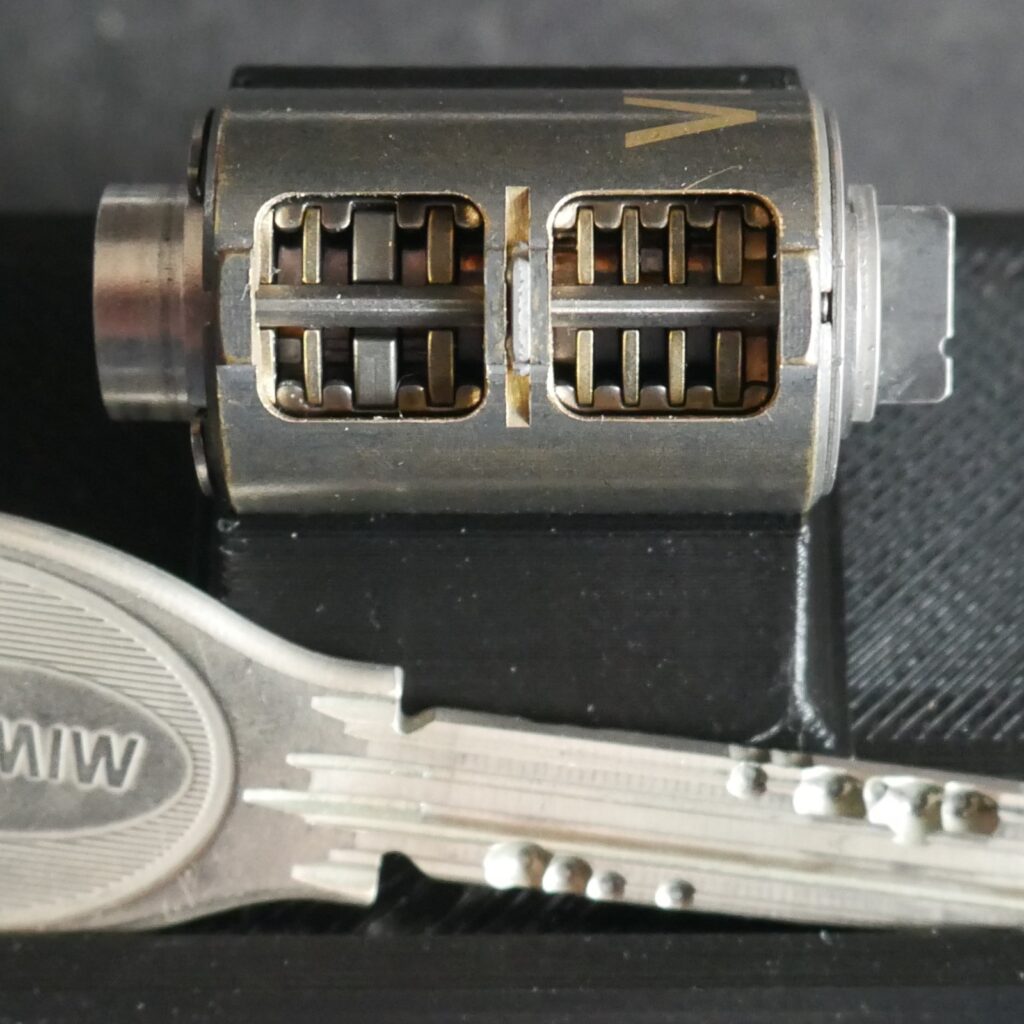
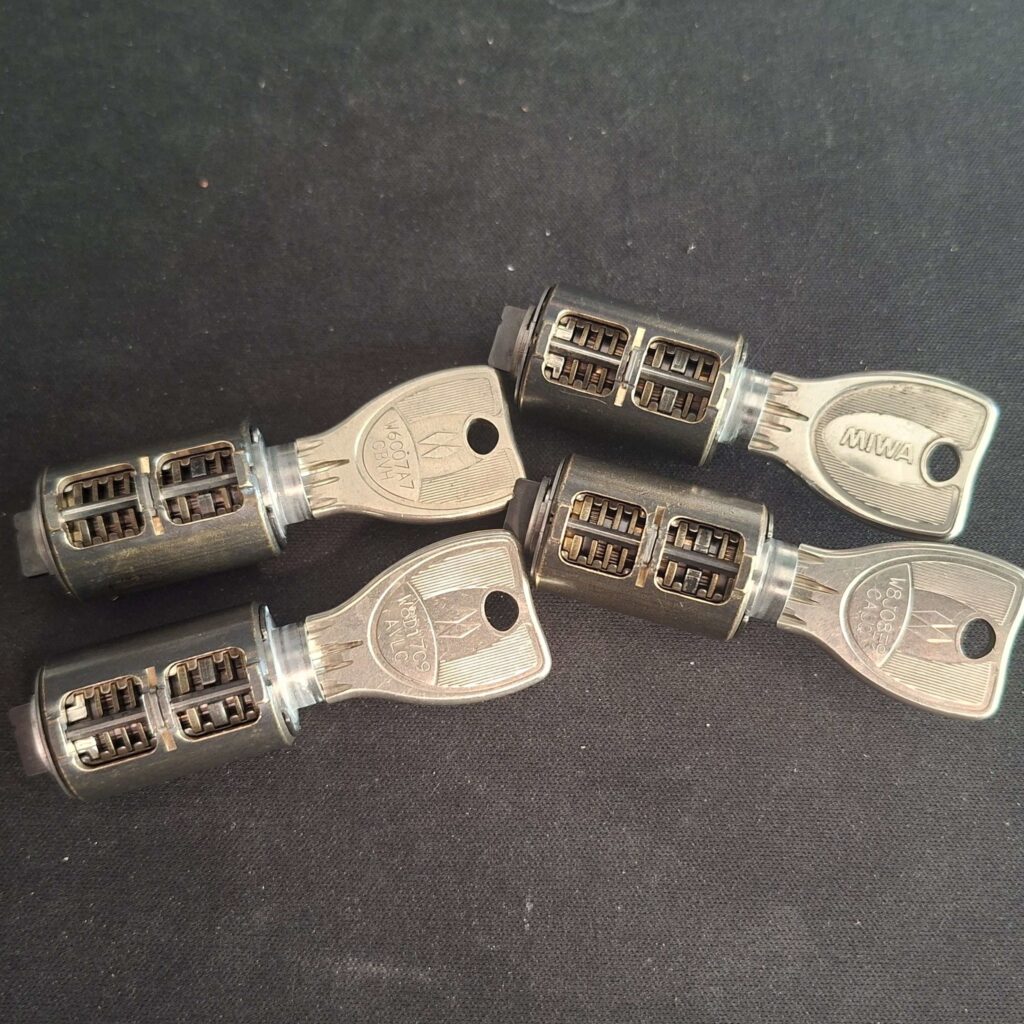
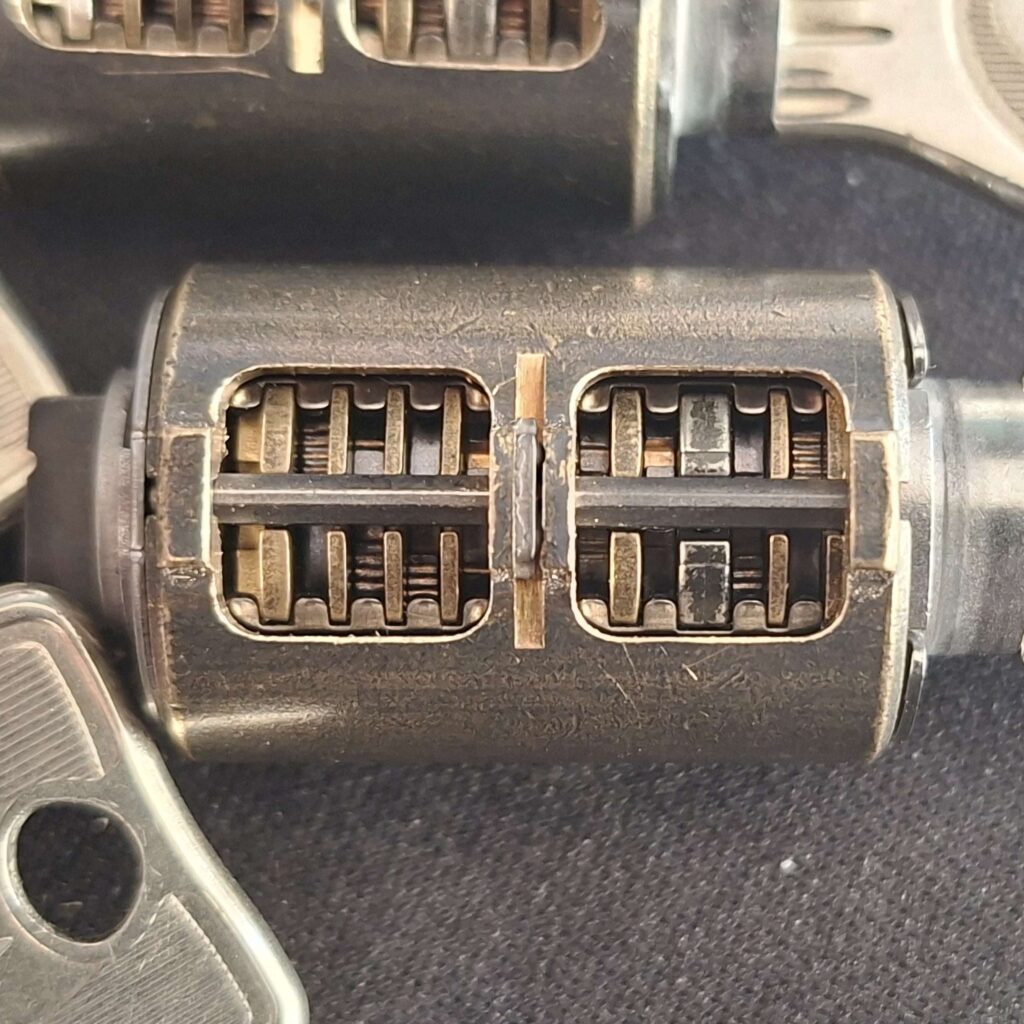
Miwa PR
Miwa makes some very interesting locks. They have a lot of moving parts that look really cool when inserting the key, so when I got the chance to buy a few, I jumped on it immediately.
The cutaway itself was fairly straightforward. just two windows cut into the side. Unfortunately, this doesn’t reveal all the discs and levers. In the center of the body, there’s a steel part that keeps the sidebar aligned, and I didn’t want to cut that out, as it could affect the functionality of the lock.
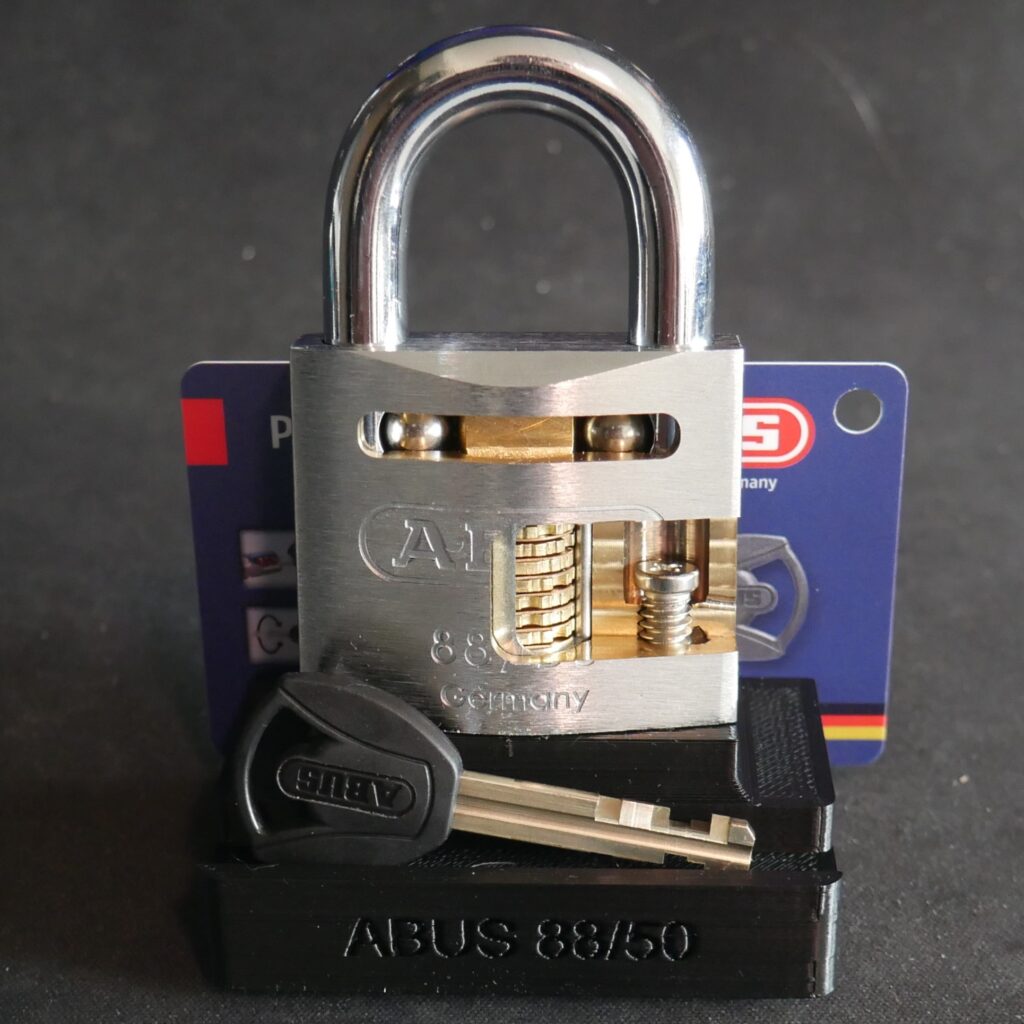
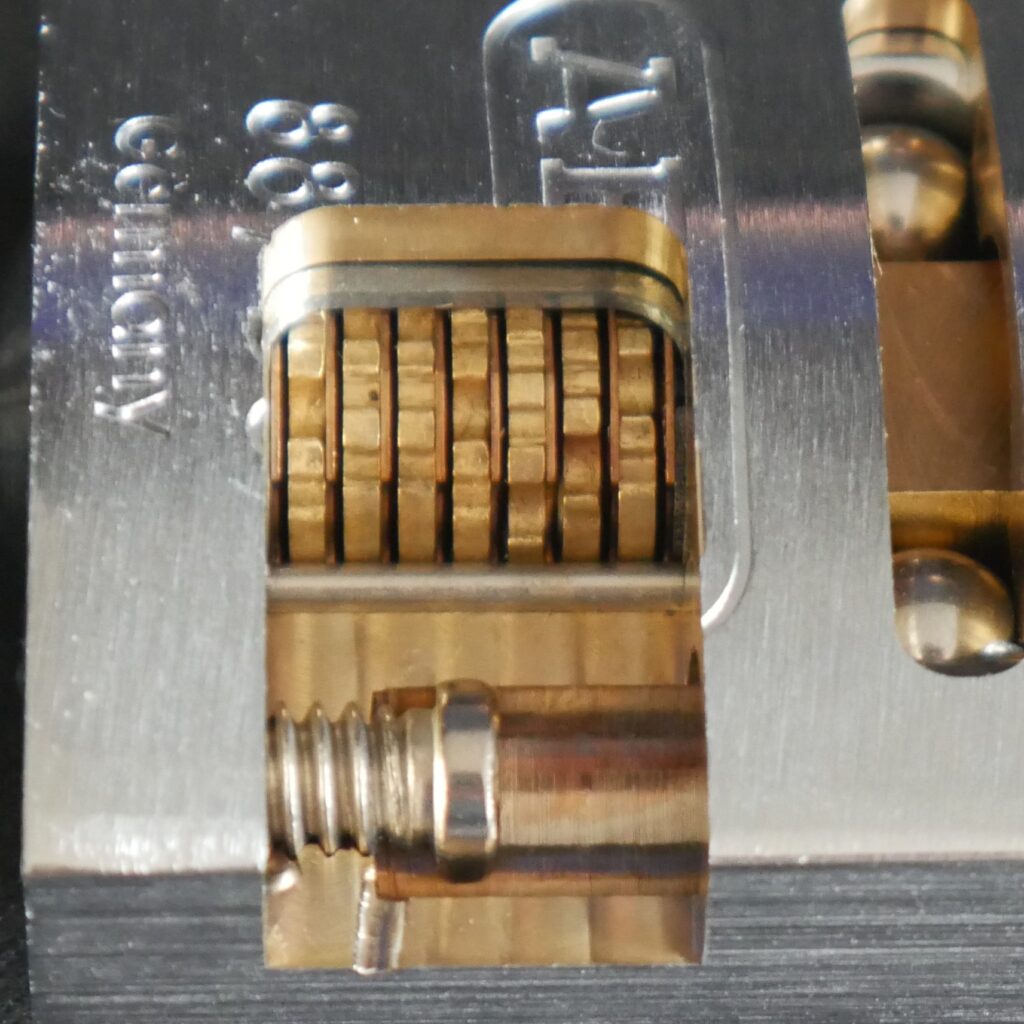
Abus 88/50 plus
I’ve worked on many different locking mechanisms, but apart from the Reliabilt I did for Grojcig, I hadn’t tackled a disc detainer yet. Since that one was made of steel, I was a bit cautious about making major cuts. I’ve wanted to add a disc detainer cutaway to my collection for a long time, but I was holding out for a brass-bodied lock since my previous experience cutting into steel wasn’t exactly great.
So when I got the chance to buy multiple Abus 88/50 locks (which had been on my wishlist for a while), I jumped at it and began designing a cutaway. This lock has a unique way of securing the core. I’ve seen other cutaways where that part was cut off, but I wanted to keep and highlight it. Specifically, I wanted to show the screw that holds two ball bearings in place. those bearings lock the core’s retaining ring.
I think the result is stunning!

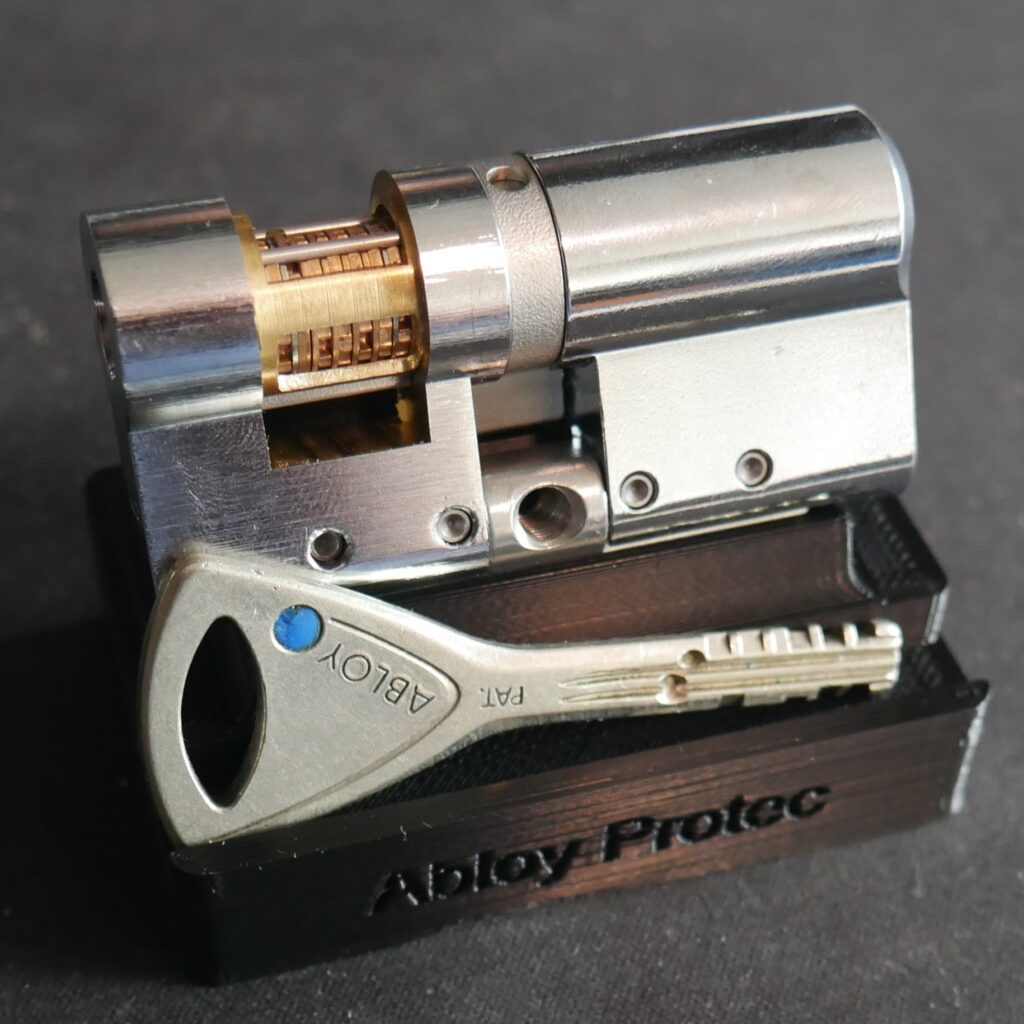
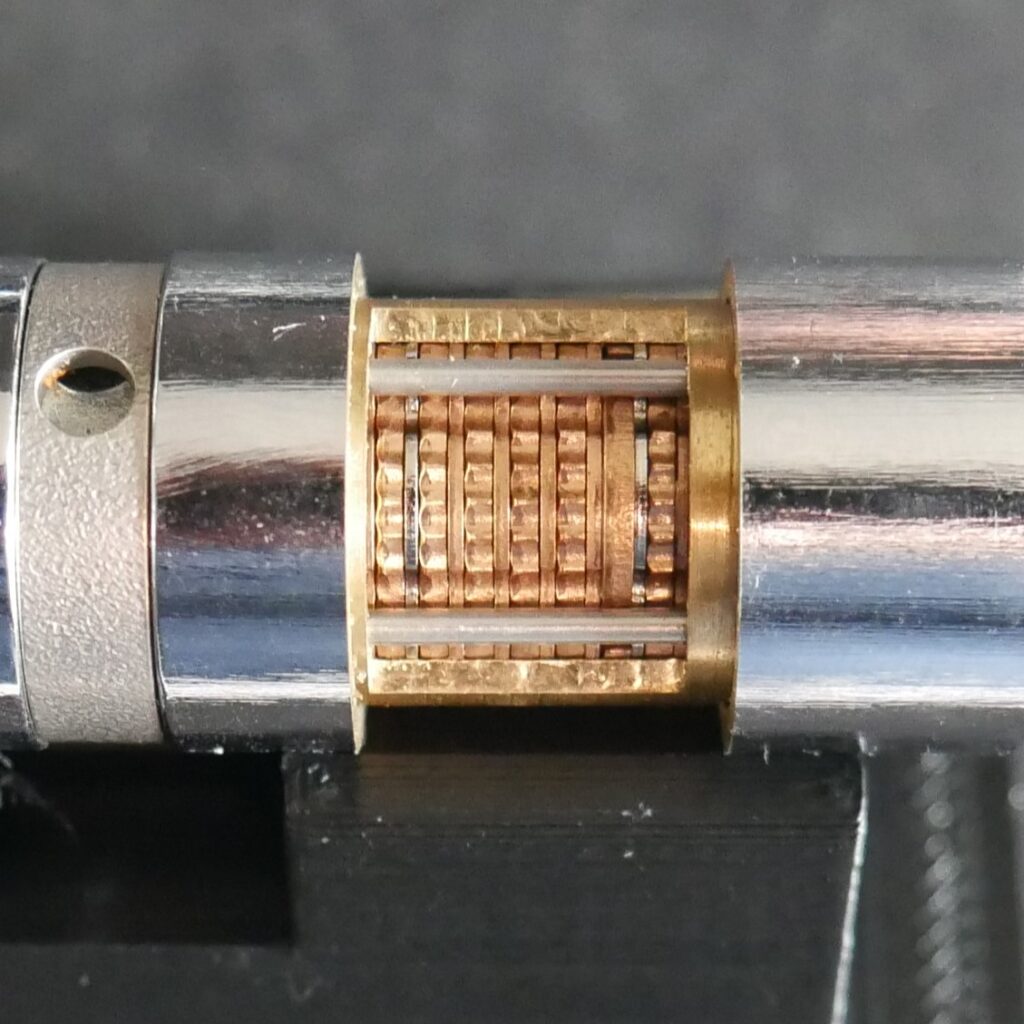
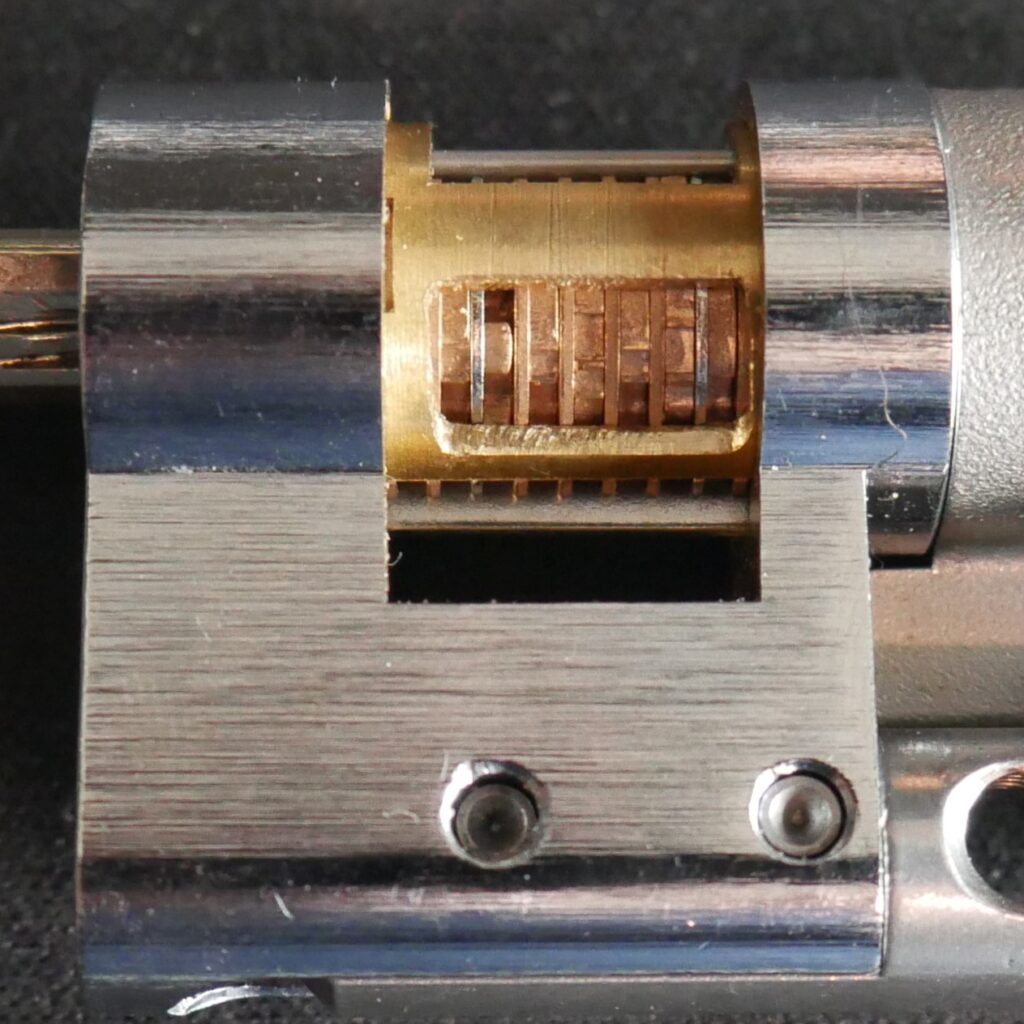
Abloy Protec
After failing to cut the PL358, the Protec was still high on my wishlist. So when I got the opportunity to work on a Protec core in a brass cylinder, I was excited to take it on. This lock has a lot going on.
The Protec cylinder features a passive key check ball bearing, the possibility for different keys to turn in opposite directions (left and right), and a mechanism that causes the core to bind if tensioned improperly.
After gutting it, I was a bit disappointed to find that the sidebar was positioned at the bottom of the lock, which made the sidebar action less visible. However, I ended up cutting three windows in the core—allowing visibility of both left and right turning behavior, as well as the disc-blocking system on top.
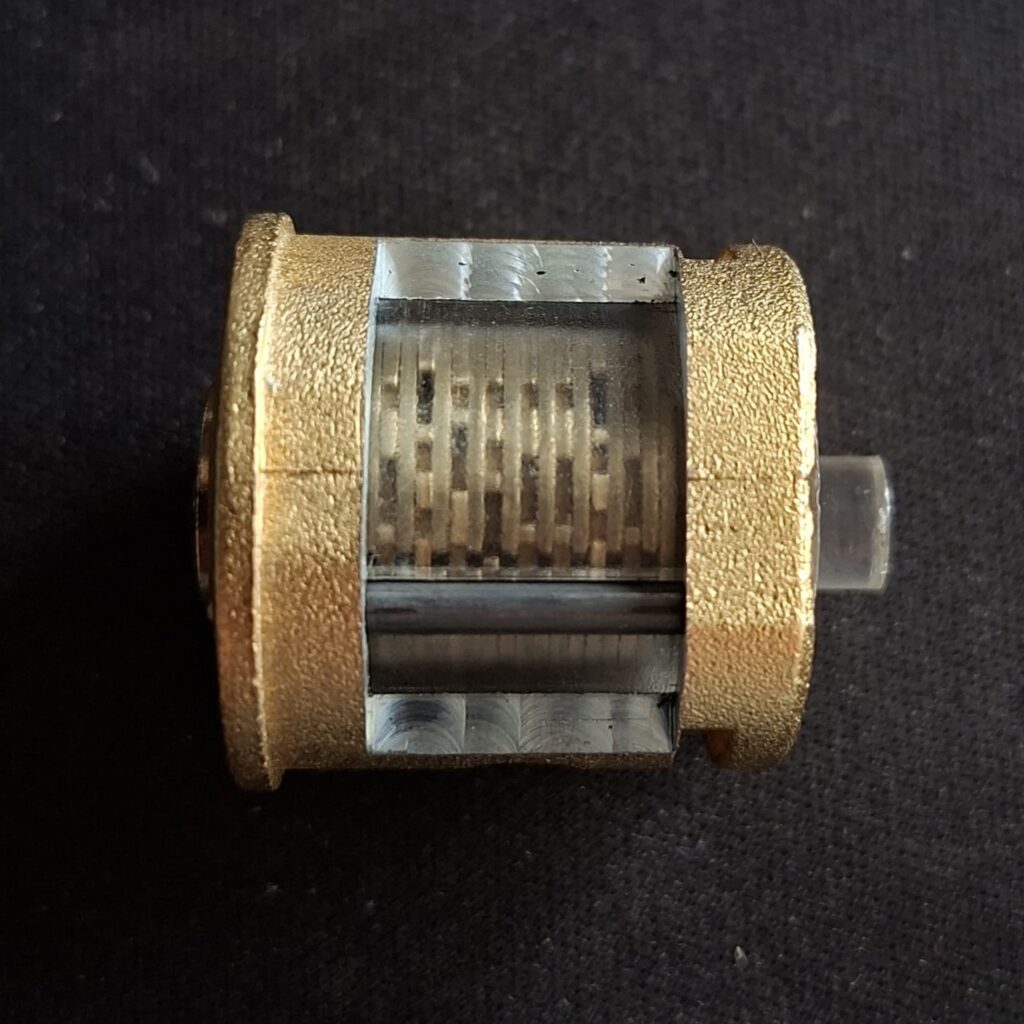
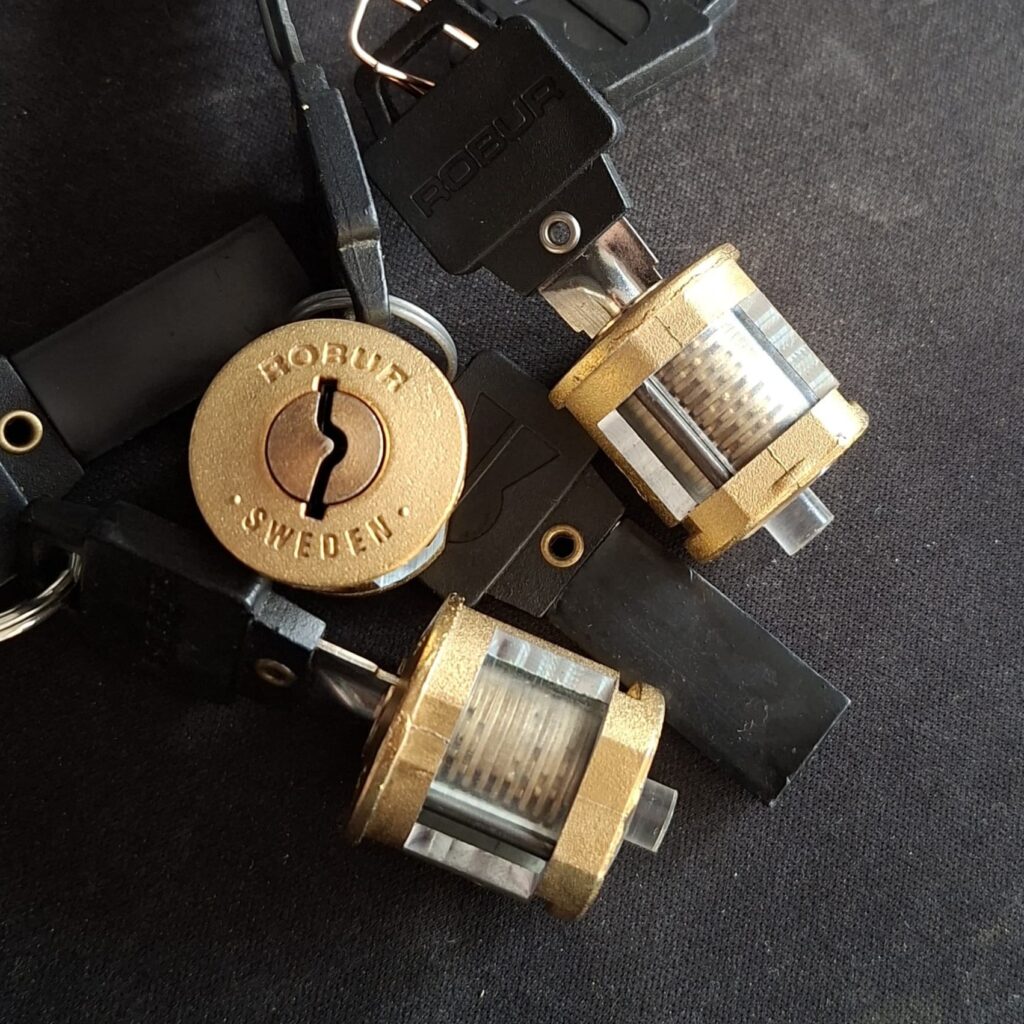
Robur DD
I bought a lot of Robur locks at an auction, and upon closer inspection, I noticed that some of them came with a transparent core. After gutting one, I saw that the core was transparent enough to view the discs inside. While the material wasn’t perfectly smooth, it was still clear enough to see the gates and other details on the discs.
So, I designed a window on the side of the lock that would reveal all of the discs without affecting its functionality. Although the outer color looked like brass, cutting into it revealed a different type of metal, but luckily, the machine handled it quite well.
The core required a thorough cleanup to remove excess grease and oxidation, but after polishing the discs, it looked awesome!
Leave a Reply